Never Get Lost Again: A 4-Step Program
Fear of getting lost--knowing where you are and how to find your way back to the dive boat--is a significant source of stress in diving.
And while few divers get so lost as to constitute an emergency, just the anxiety of not knowing the way home is enough to ruin your dive.
So Why Do I Get Lost?

Why is it that you can find your car in the Wal-Mart parking lot, but as soon as you put your head under water you're disoriented? One reason is that underwater landmarks are less familiar. When you can put the name "Lexus" to that silver thing two rows to the left of your car, you're more likely to remember it.
-
To see into the water better, get as high on the boat as possible, use polarized sunglasses, shade your eyes and look away from the sun.
-
A compass can help. Draw your map with north at the top of the slate. Under water, all you have to do is turn it until the compass needle points toward the top of the slate. Now, what's to the left on the slate is to your left in reality, and so on.
-
Another compass trick: Take bearings from the boat (or entry point) to the prominent landmarks you identified, and write them down. The reciprocals are return routes to the boat.
-
To see which way the current is flowing, look for the ripples around a stationary object like a mooring pole or the anchor chain as it emerges from the water. Don't be fooled by surface waves, which usually flow with the wind, not the current.
-
Don't like to carry a slate? Think of it like training wheels--a temporary expedient. When you get better at observing your surroundings and assembling a mental map, you can probably dispense with it.
-
Often the dive boat will not be anchored over the dive site itself, but will be a little offshore from the dive site. Plan to end your "blue water" transit at some landmark you'll be able to recognize later--like a rock that juts out from the reef. Record the compass bearing to the landmark; the reciprocal will bring you back to the dive boat.
-
If there is no such landmark, you may be able to make one with a small pile of rocks (no coral, please) or a spare dive weight. Follow a convenient compass course to the site and stack up a few rocks in a prominent place when you get there. Remember its depth. This will be your takeoff point on the reciprocal course. (Knock down the pile when you leave it for the last time.)
-
An out-and-back route need not be a straight line. You can instead follow the wall, or a bottom contour, or a chain of landmarks.
-
Descend head-up and, as much as possible, facing the same way to retain your sense of direction.
-
Define the direction of the bottom's slope by looking for the "fall line." That's the direction a ball would roll downhill.
-
If you're making a blue-water transit to the dive site, count fin kicks to give you an idea of distance. On your return you should find the anchor line with the same number of kicks, give or take 10 percent.
-
Before you go far from a landmark, glance back for a look at the other side of it close up. It may look very different.
-
Often, the most noticeable landmarks are things that don't belong, like bits of trash. (You might pick up the trash on your return route.)
-
If a landmark is not large and obvious, noting its depth will help you find it again. Maintaining a constant depth for most of your route simplifies navigation.
-
Along the way from A to B to C, check your compass or the direction to the sun. Often, a reef or wall curves gradually. You may think you're swimming in a straight line and in fact make a circle.
-
Learn to identify the common corals, sponges, fans and other stationary life forms where you dive. When you can put a name to something and know its identifying characteristics (like that silver Lexus), it is more likely to stick in your mind.
-
Nature's hint: Ripples in a sandy bottom normally parallel the shore. The steeper side of the ripple will be toward shore.
-
If you give up and surface to look for the dive boat, don't assume the first boat you see is yours. More than one diver has swum off in the wrong direction, to the wrong boat. Scan the full horizon, take a compass bearing to your target and descend to about 15 feet to make the transit.
-
Debrief yourself when you're back on the dive boat. Why did you get lost? Where did you get lost? What can you do better next time?
-
Make sure the dial is rotating freely. If you don't hold the compass level, the dial will bind up and not give a true reading. To check, rotate the compass body in your hand. The dial should not move.
-
Fine-tune your buoyancy before taking a compass reading. If you are fighting to maintain your position in the water column, you will be distracted and more likely to get a false reading.
-
The back of your instrument console may not be the best place to mount your compass. The high-pressure hose is often short and always stiff, and can make it harder to hold the compass level and point the body accurately. Try mounting it on your slate or on your wrist or holding it in your hand (clip it to a retractor).
Another reason is the way underwater navigation is taught, as if the subject began and ended with the compass. The ability to follow a rectangular search pattern back to your starting point has almost nothing to do with how most of us actually dive and get lost. In fact, the compass is a valuable accessory, but you usually don't need to keep your nose on it to find your way.
And maybe the biggest reason divers get lost is the follow-the-leader nature of so much resort diving. Just as dominant divers can produce dependent buddies, dive guides can produce disoriented divers. Ever try to remember the route the car took when you were riding in the back seat?
The keys to finding your way around under water are observation and mental imaging. Do this:
Step 1: Make a Mental Map
Before you get wet, you want to be able to picture a map of the dive site in your head. The best way to do that is to sketch a real map on a dive slate. Sometimes the simple act of making the map helps fix the picture in your head, even if you never look at it again. And you can always refer to the slate under water.
Start with the divemaster's description of the site, and don't be reluctant to ask questions. Mark depths to the bottom, if they are known. Be sure to mark the location of the dive boat, or your entry point from shore. Add your own observations. Many of the most prominent features under water, like reefs, walls and kelp beds, will be visible from the surface. For example, the color of the water will indicate deep or shallow, so you should be able to trace the top of a wall if it's not too deep. Coral heads will look brown or black. Pay special attention to surface indications of features that may be "landmarks" under water, like a detached rock or a sharp angle in the reef.
If you're diving close to shore, the shape of land above water often indicates the bottom contour. A steep cliff dropping into the water probably continues to drop steeply under water, for example. A partially submerged rock that's steep on one side and gradually sloping on the other will probably have the same shape below the surface.
Finally, mark down the direction of the current and the position of the sun with arrows. If the visibility is reasonably good, you will be able to see the sun under water. If it is not directly overhead, the direction to the sun and the shadows it casts can be direction indicators.
Tips
Step 2: Plan a Route
If you're worried about getting lost once you're under water, plan a route through the dive site and try to stick to it instead of wandering randomly. Draw the route on your map and note which landmarks you'll pass along the way. An out-and-back route presents the least chance of disorientation because you pass the same landmarks coming and going. It's not as boring as it sounds because those landmarks, while recognizable, will look different from the other direction.
Tips
Step 3: Stop Before You Go
Once you've entered the water and descended to the bottom, or to the point in the water column from which you'll begin the first leg of your planned route, stop. Look around you, at the bottom and out toward the limit of visibility.
Use your compass or the direction of the sun to orient what you see to your map. Note the depth at the anchor. Note the trend of the bottom: which direction is shallower water, which direction is deeper? Feel the direction of the current. Add all this to your mental or physical map.
Look for unusually shaped rocks or coral outcrops or sponges out in the distance and try to remember them. If you're off-course on your return to the anchor line, you may find one of them and know where you are. Find which way you'll go on the first leg of your route. Look for a landmark you can aim for.
It's also a good idea to pause after your descent, to recheck your equipment and your buddy, adjust your buoyancy and generally calm down. Use that moment to also get your bearings.
Tips
Step 4: Follow a Chain of Landmarks
The key to staying oriented is observing your surroundings, and the enemy of observation is constant motion. Too many divers think they have to keep moving constantly, like sharks. When their eyes drift across the bottom, each rock, each sponge gets the same glance and no single thing stands out. Their surroundings become a slow-motion blur.
Instead, think of your route through the dive site as a series of legs from A to B to C and so on. Look ahead to the most prominent landmark near the limit of visibility, the next outcrop or corner of the reef or free-standing rock. That's "B." When you reach it, pause a moment and look back at "A." That's what this leg will look like on your return (assuming an out-and-back route). Now look ahead to choose landmark "C" and start toward it. When you reach landmark "C," pause, look back at "B" and so on.
Tips
You're Lost: Now What?
You got excited trying to follow that shark, got "off the trail" and now you don't know where you are? The first step is to relax and check your gas supply and your depth.
You probably haven't paid any attention to your compass during the chase. But if you know that shallower water has been to the west and you're now over the deep blue, go west to find bottom. Likewise, if the bottom is now shallower than before, go east. Your goal is to find bottom at the same depth as before you wandered. If you haven't been using a compass, the direction of the sun may give the same clue.
Once you find bottom at the depth of your last landmark, return in the direction from which you came (putting the reef on your left instead of your right, for example) until you recognize a landmark.
If you don't recognize anything in a reasonable time, stop a moment and take a deep breath. Are you sure you're going in the right direction? Are you sure you're at the right depth? If all else fails, surface--slowly and with a safety stop--and get your bearings before wandering too far.
Tips
Technology to the Rescue
You might think there's a technological solution to underwater navigation. There isn't one yet, though there have been attempts.
Ultrasonic locator. This is the most successful electronic navigation aid for divers so far. The Uwatec "Neverlost" and the Desert Star "Scout" are two examples. Each includes two parts: a transmitter you attach to the boat, the anchor or wherever, and a receiver you carry with you. The receiver tells you the direction, and in some cases the distance, back to the transmitter. It's good for finding your way back to a fixed point, but crude for any other purpose, like figuring out the bearing to the reef. Look for a review of all these devices in an upcoming issue.
GPS. Sorry. GPS, which reads signals from an array of satellites, is phenomenally accurate on the surface, but the signals are too weak to penetrate the water.
Digital compass. It's really a magnetic compass, but with a digital readout. The face displays "240?" for example, instead of an arrow. Several of these have been introduced in the last few years, but have failed to take hold in the market.
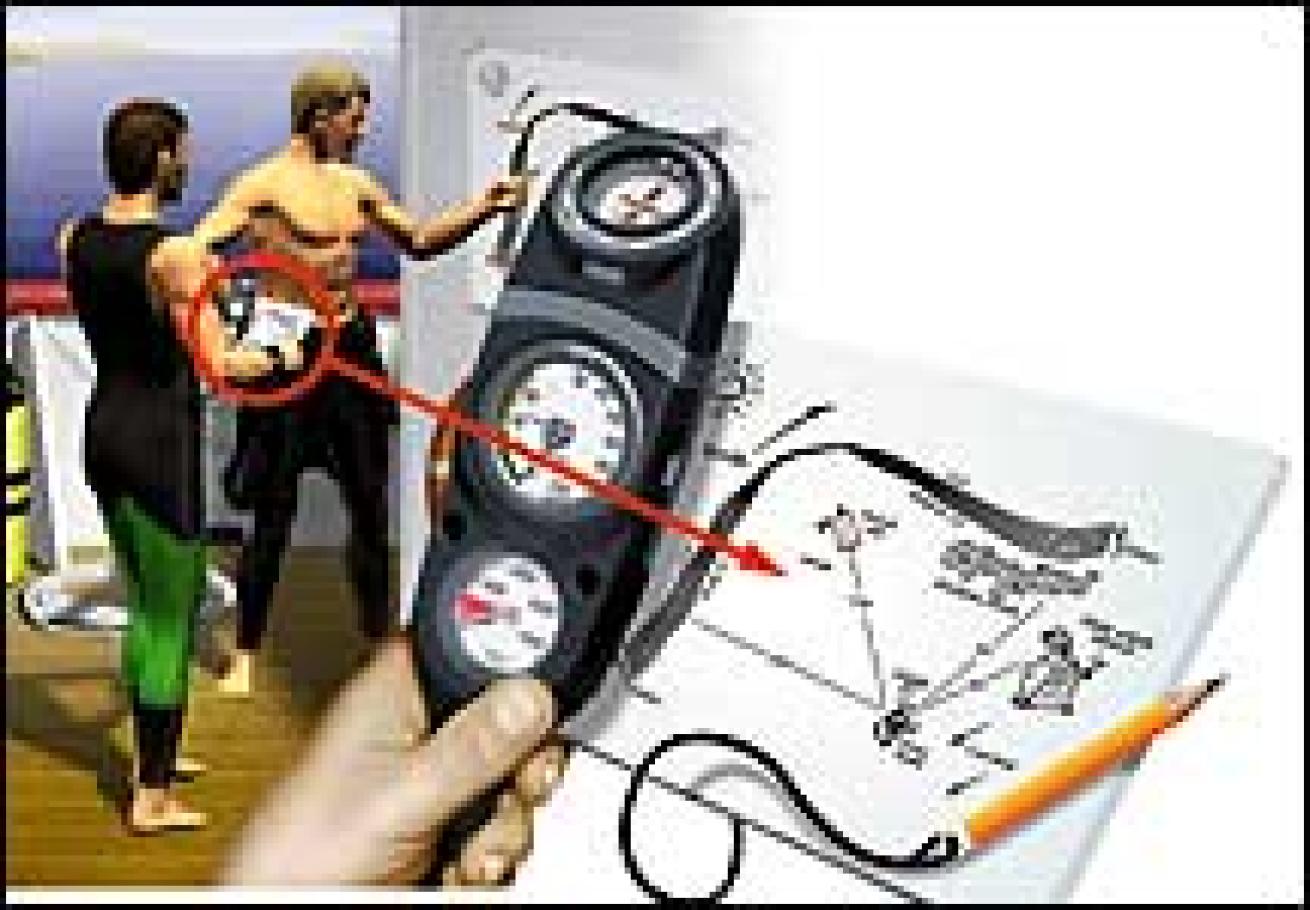
The Mystery of the Compass
Actually, it's simple. Every compass has only three parts: a rotating dial that always points north, a body that you can point wherever you want, and an adjustable ring (the "bezel") that's just a memory aid for the difference between the first two.
Numbers may be marked on the dial or the body--it doesn't matter which. Their only purpose is to measure the difference between where the dial points and where the body points. Typically, you rotate the bezel until its mark aligns with the north mark on the dial. To find the same course again you don't need to remember a number, just align the marks.
Tips
Fear of getting lost--knowing where you are and how to find your way back to the dive boat--is a significant source of stress in diving.
And while few divers get so lost as to constitute an emergency, just the anxiety of not knowing the way home is enough to ruin your dive.
So Why Do I Get Lost?
Why is it that you can find your car in the Wal-Mart parking lot, but as soon as you put your head under water you're disoriented? One reason is that underwater landmarks are less familiar. When you can put the name "Lexus" to that silver thing two rows to the left of your car, you're more likely to remember it.
Another reason is the way underwater navigation is taught, as if the subject began and ended with the compass. The ability to follow a rectangular search pattern back to your starting point has almost nothing to do with how most of us actually dive and get lost. In fact, the compass is a valuable accessory, but you usually don't need to keep your nose on it to find your way.
And maybe the biggest reason divers get lost is the follow-the-leader nature of so much resort diving. Just as dominant divers can produce dependent buddies, dive guides can produce disoriented divers. Ever try to remember the route the car took when you were riding in the back seat?
The keys to finding your way around under water are observation and mental imaging. Do this:
Step 1: Make a Mental Map
Before you get wet, you want to be able to picture a map of the dive site in your head. The best way to do that is to sketch a real map on a dive slate. Sometimes the simple act of making the map helps fix the picture in your head, even if you never look at it again. And you can always refer to the slate under water.
Start with the divemaster's description of the site, and don't be reluctant to ask questions. Mark depths to the bottom, if they are known. Be sure to mark the location of the dive boat, or your entry point from shore. Add your own observations. Many of the most prominent features under water, like reefs, walls and kelp beds, will be visible from the surface. For example, the color of the water will indicate deep or shallow, so you should be able to trace the top of a wall if it's not too deep. Coral heads will look brown or black. Pay special attention to surface indications of features that may be "landmarks" under water, like a detached rock or a sharp angle in the reef.
If you're diving close to shore, the shape of land above water often indicates the bottom contour. A steep cliff dropping into the water probably continues to drop steeply under water, for example. A partially submerged rock that's steep on one side and gradually sloping on the other will probably have the same shape below the surface.
Finally, mark down the direction of the current and the position of the sun with arrows. If the visibility is reasonably good, you will be able to see the sun under water. If it is not directly overhead, the direction to the sun and the shadows it casts can be direction indicators.
Tips
To see into the water better, get as high on the boat as possible, use polarized sunglasses, shade your eyes and look away from the sun.
A compass can help. Draw your map with north at the top of the slate. Under water, all you have to do is turn it until the compass needle points toward the top of the slate. Now, what's to the left on the slate is to your left in reality, and so on.
Another compass trick: Take bearings from the boat (or entry point) to the prominent landmarks you identified, and write them down. The reciprocals are return routes to the boat.
To see which way the current is flowing, look for the ripples around a stationary object like a mooring pole or the anchor chain as it emerges from the water. Don't be fooled by surface waves, which usually flow with the wind, not the current.
Don't like to carry a slate? Think of it like training wheels--a temporary expedient. When you get better at observing your surroundings and assembling a mental map, you can probably dispense with it.
Step 2: Plan a Route
If you're worried about getting lost once you're under water, plan a route through the dive site and try to stick to it instead of wandering randomly. Draw the route on your map and note which landmarks you'll pass along the way. An out-and-back route presents the least chance of disorientation because you pass the same landmarks coming and going. It's not as boring as it sounds because those landmarks, while recognizable, will look different from the other direction.
Tips
Often the dive boat will not be anchored over the dive site itself, but will be a little offshore from the dive site. Plan to end your "blue water" transit at some landmark you'll be able to recognize later--like a rock that juts out from the reef. Record the compass bearing to the landmark; the reciprocal will bring you back to the dive boat.
If there is no such landmark, you may be able to make one with a small pile of rocks (no coral, please) or a spare dive weight. Follow a convenient compass course to the site and stack up a few rocks in a prominent place when you get there. Remember its depth. This will be your takeoff point on the reciprocal course. (Knock down the pile when you leave it for the last time.)
An out-and-back route need not be a straight line. You can instead follow the wall, or a bottom contour, or a chain of landmarks.
Step 3: Stop Before You Go
Once you've entered the water and descended to the bottom, or to the point in the water column from which you'll begin the first leg of your planned route, stop. Look around you, at the bottom and out toward the limit of visibility.
Use your compass or the direction of the sun to orient what you see to your map. Note the depth at the anchor. Note the trend of the bottom: which direction is shallower water, which direction is deeper? Feel the direction of the current. Add all this to your mental or physical map.
Look for unusually shaped rocks or coral outcrops or sponges out in the distance and try to remember them. If you're off-course on your return to the anchor line, you may find one of them and know where you are. Find which way you'll go on the first leg of your route. Look for a landmark you can aim for.
It's also a good idea to pause after your descent, to recheck your equipment and your buddy, adjust your buoyancy and generally calm down. Use that moment to also get your bearings.
Tips
Descend head-up and, as much as possible, facing the same way to retain your sense of direction.
Define the direction of the bottom's slope by looking for the "fall line." That's the direction a ball would roll downhill.
If you're making a blue-water transit to the dive site, count fin kicks to give you an idea of distance. On your return you should find the anchor line with the same number of kicks, give or take 10 percent.
Step 4: Follow a Chain of Landmarks
The key to staying oriented is observing your surroundings, and the enemy of observation is constant motion. Too many divers think they have to keep moving constantly, like sharks. When their eyes drift across the bottom, each rock, each sponge gets the same glance and no single thing stands out. Their surroundings become a slow-motion blur.
Instead, think of your route through the dive site as a series of legs from A to B to C and so on. Look ahead to the most prominent landmark near the limit of visibility, the next outcrop or corner of the reef or free-standing rock. That's "B." When you reach it, pause a moment and look back at "A." That's what this leg will look like on your return (assuming an out-and-back route). Now look ahead to choose landmark "C" and start toward it. When you reach landmark "C," pause, look back at "B" and so on.
Tips
Before you go far from a landmark, glance back for a look at the other side of it close up. It may look very different.
Often, the most noticeable landmarks are things that don't belong, like bits of trash. (You might pick up the trash on your return route.)
If a landmark is not large and obvious, noting its depth will help you find it again. Maintaining a constant depth for most of your route simplifies navigation.
Along the way from A to B to C, check your compass or the direction to the sun. Often, a reef or wall curves gradually. You may think you're swimming in a straight line and in fact make a circle.
Learn to identify the common corals, sponges, fans and other stationary life forms where you dive. When you can put a name to something and know its identifying characteristics (like that silver Lexus), it is more likely to stick in your mind.
You're Lost: Now What?
You got excited trying to follow that shark, got "off the trail" and now you don't know where you are? The first step is to relax and check your gas supply and your depth.
You probably haven't paid any attention to your compass during the chase. But if you know that shallower water has been to the west and you're now over the deep blue, go west to find bottom. Likewise, if the bottom is now shallower than before, go east. Your goal is to find bottom at the same depth as before you wandered. If you haven't been using a compass, the direction of the sun may give the same clue.
Once you find bottom at the depth of your last landmark, return in the direction from which you came (putting the reef on your left instead of your right, for example) until you recognize a landmark.
If you don't recognize anything in a reasonable time, stop a moment and take a deep breath. Are you sure you're going in the right direction? Are you sure you're at the right depth? If all else fails, surface--slowly and with a safety stop--and get your bearings before wandering too far.
Tips
Nature's hint: Ripples in a sandy bottom normally parallel the shore. The steeper side of the ripple will be toward shore.
If you give up and surface to look for the dive boat, don't assume the first boat you see is yours. More than one diver has swum off in the wrong direction, to the wrong boat. Scan the full horizon, take a compass bearing to your target and descend to about 15 feet to make the transit.
Debrief yourself when you're back on the dive boat. Why did you get lost? Where did you get lost? What can you do better next time?
Technology to the Rescue
You might think there's a technological solution to underwater navigation. There isn't one yet, though there have been attempts.
Ultrasonic locator. This is the most successful electronic navigation aid for divers so far. The Uwatec "Neverlost" and the Desert Star "Scout" are two examples. Each includes two parts: a transmitter you attach to the boat, the anchor or wherever, and a receiver you carry with you. The receiver tells you the direction, and in some cases the distance, back to the transmitter. It's good for finding your way back to a fixed point, but crude for any other purpose, like figuring out the bearing to the reef. Look for a review of all these devices in an upcoming issue.
GPS. Sorry. GPS, which reads signals from an array of satellites, is phenomenally accurate on the surface, but the signals are too weak to penetrate the water.
Digital compass. It's really a magnetic compass, but with a digital readout. The face displays "240?" for example, instead of an arrow. Several of these have been introduced in the last few years, but have failed to take hold in the market.
The Mystery of the Compass
Actually, it's simple. Every compass has only three parts: a rotating dial that always points north, a body that you can point wherever you want, and an adjustable ring (the "bezel") that's just a memory aid for the difference between the first two.
Numbers may be marked on the dial or the body--it doesn't matter which. Their only purpose is to measure the difference between where the dial points and where the body points. Typically, you rotate the bezel until its mark aligns with the north mark on the dial. To find the same course again you don't need to remember a number, just align the marks.
Tips
Make sure the dial is rotating freely. If you don't hold the compass level, the dial will bind up and not give a true reading. To check, rotate the compass body in your hand. The dial should not move.
Fine-tune your buoyancy before taking a compass reading. If you are fighting to maintain your position in the water column, you will be distracted and more likely to get a false reading.
The back of your instrument console may not be the best place to mount your compass. The high-pressure hose is often short and always stiff, and can make it harder to hold the compass level and point the body accurately. Try mounting it on your slate or on your wrist or holding it in your hand (clip it to a retractor).