Showcasing Shipwrecks

April 2007
Text and Photography by Stephen Frink
Whether they were run aground by storm or stupidity, whether they're warships that were sunk in battle or freighters that were cleaned and intentionally sunk as dive attractions, ships on the seafloor share a compelling element-each has a story that can be told through still images. In 25 years of photographing shipwrecks, I've learned a few valuable lessons. Here are seven tips for making your wreck photos the best they can be.
1 Be Conscious of Safety
Shipwrecks are often overhead environments with attendant hazards. Not all ships are penetrable, but those that are are essentially caves, with similar risks of entanglement or disorientation. Many of the best wrecks are also deep because ships that run aground in very shallow water are either salvaged or beat to smithereens by storm-driven waves.
The most accessible wrecks are in the 50- to 120-foot range, and because they are essentially square profiles, provide little opportunity for offgassing with a multi-level dive plan. Obey your computer and allow plenty of time for a safety stop at 15 feet. For more complex wrecks, study available maps, listen to the dive briefing, and consider safety precautions like the rule of thirds and using wreck lines. Even though you may have plenty of shots left on that eight-gigabyte memory card, safe bottom time has to trump your digital camera's image capacity. No photo is worth getting bent or killed for.
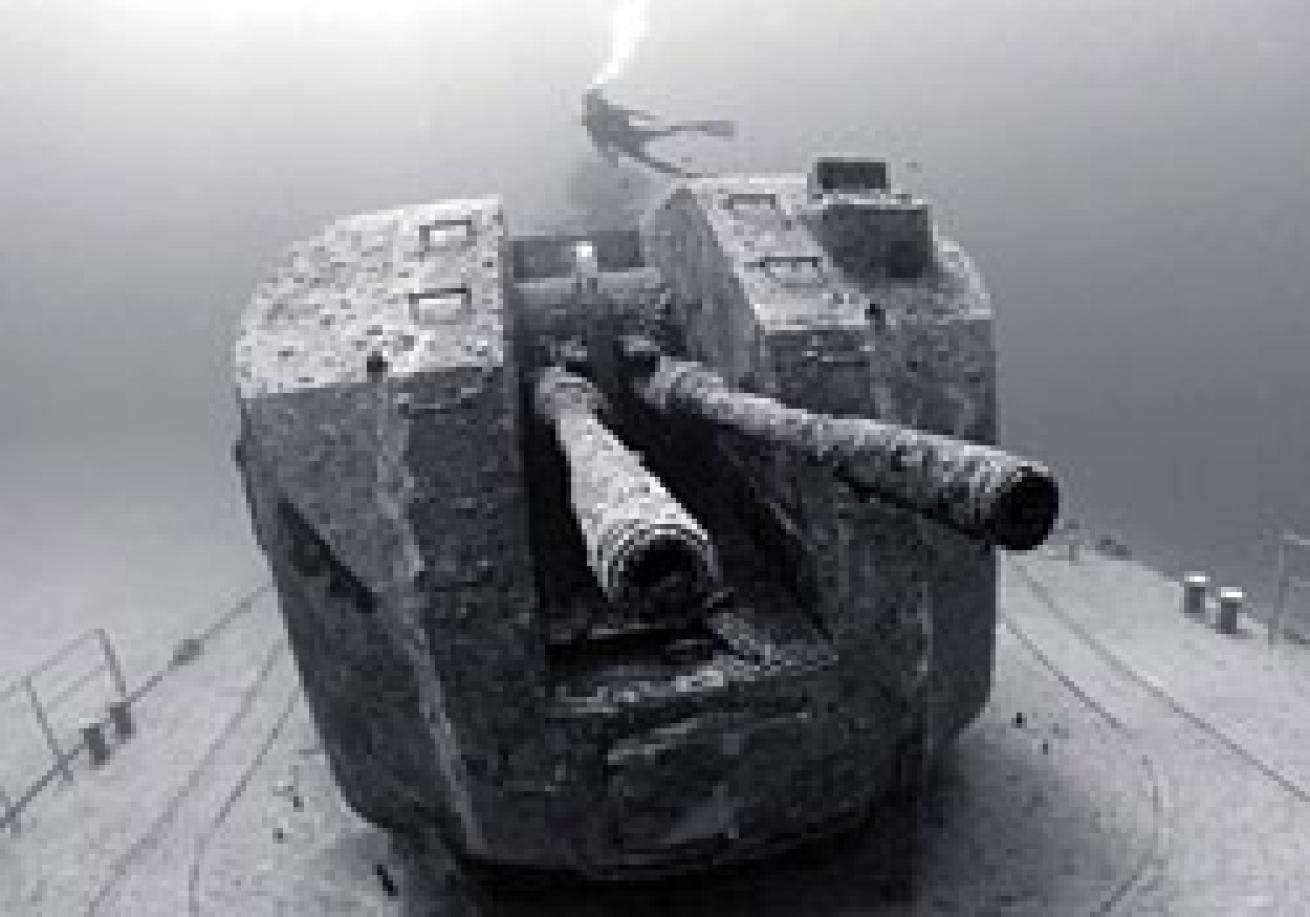
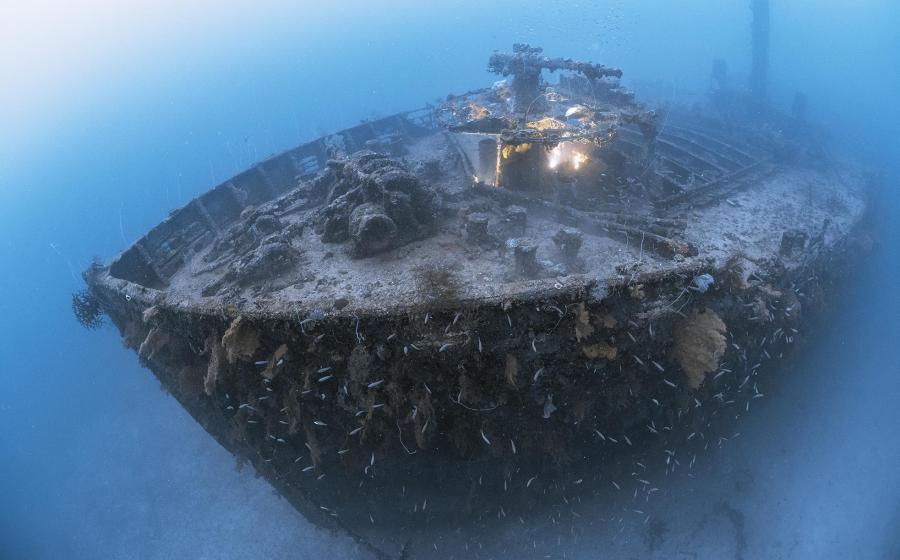
2 Know and Communicate the History
There is a story behind the sinking of every ship on the seafloor. Knowing a ship's backstory will help you capture the essence of the site. In Key Largo, the wreck of the Benwood was a casualty of World War II. It went down after colliding at night with the Robert C. Tuttle-both ships were navigating without lights to avoid the German U-boats that were prowling the South Florida coast. While it was later blown apart to prevent any hazard to navigation (the Benwood rests in only 25 to 40 feet of water), the bow still shows evidence of the accident that sealed its fate. Capturing that impact point in a wide-angle photo helps tell the Benwood's story. Likewise, the Japanese ships at the bottom of Truk Lagoon, sunk during World War II's Operation Hailstone, are full of artifacts of war and simple shipboard life. These wrecks are spectacular artificial reefs as well, emblazoned with soft corals and abundant marine life. But the guns, munitions and chinaware are all fascinating vignettes that complete a photographic story of these wrecks.
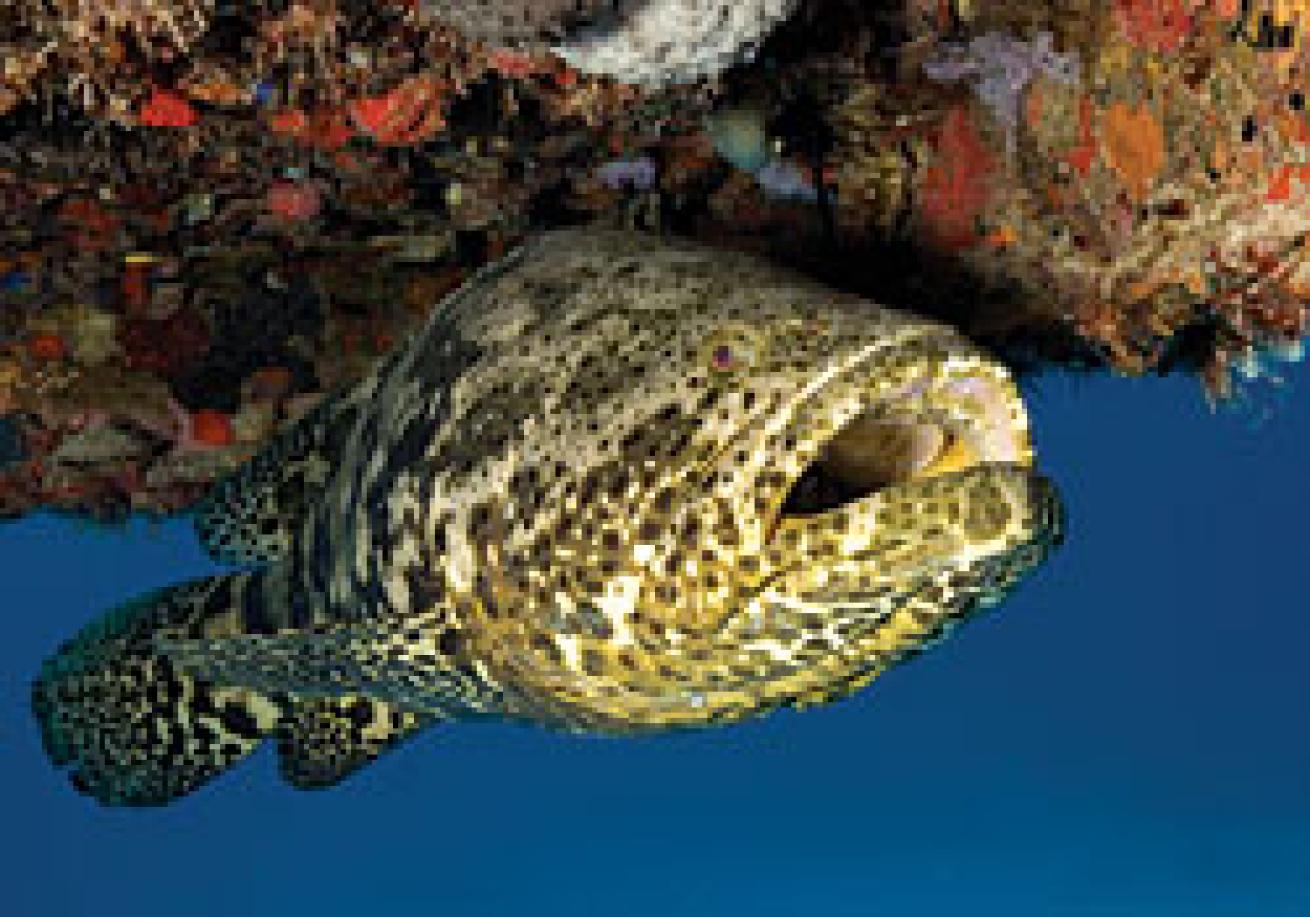
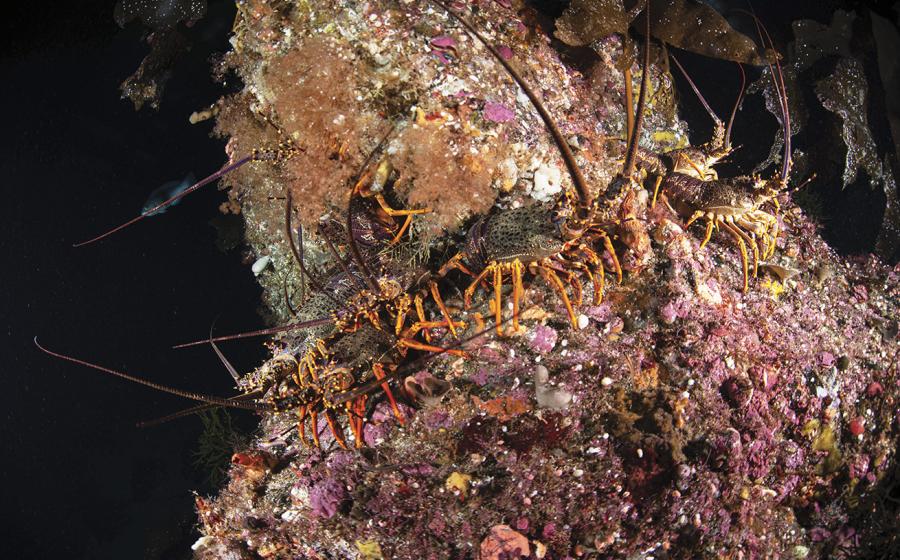
3 Don't Forget the Fish
Shipwrecks are wonderfully effective at attracting marine life, in some cases even more so than coral reefs. Their beams and doorways are often cloaked with corals and sponges, providing brilliantly colorful accents. Their myriad nooks and crannies provide a place for schooling fish to hide from the current or predators to lurk, awaiting unsuspecting prey. When the wreck is a self-contained environment, many fish seem reluctant to swim off into the blue to avoid a photographer, allowing better access to normally reclusive creatures. While much of wreck photography is wide-angle work, tighter compositions concentrating on a wreck's residents can be equally productive. Many wrecks even offer potential for macro photography, but the reality is that the big picture is so spectacular it is often hard to give up the fisheye lens for the macro optic.
4 Control Your Buoyancy and Breathing
Silt stirred up by a careless fin kick or sloppy buoyancy control can create backscatter and ruin a picture. Even worse, it can silt out a companionway to such an extent that it's easy to get disoriented. Obviously, the best wreck photographers have good diving skills. But even the best divers need to breathe, and exhalation bubbles can sometimes dislodge rust, silt and paint chips that rain down into the water column, ruining a photo's potential. When entering any overhead compartment, be prepared to work very quickly because you may get only a few shots before it is too dirty to continue. Before entering the shoot zone, have all shutter speed and aperture variables set, strobes properly positioned and breathing in control. If you do stir up silt, keep in mind that it takes at least 10 minutes or so for sediments to settle.
5 Bring the Tools
It usually takes a wide-angle lens to tell a wreck's story. The fisheye lens, like the 10.5mm Nikkor on a housed Nikon digital or the 15mm on a full-frame Canon, is excellent to show the size of a wreck, and to use forced perspective to make a gun emplacement or windlass seem even more impressive. However, the extreme barrel distortion of a lens like this might be problematic when showing a wheelhouse doorway. For more authentic rendering of the straight lines of a wreck, a versatile wide-angle zoom, like the Nikkor 12-24mm or Canon 17-40mm, is ideal. These lenses are great for capturing schooling fish as well, so they allow for the greatest range of imaging diversity on a single wreck dive.
The strobe is also very important to wreck photography. While some ships are shallow enough to shoot in available light, with or without filters, and other wrecks might be captured with an available-light "establishing shot" from a distance to show the general profile of the vessel, the photos taken on deck and inside compartments should be lit by strobe. I like a strobe with a powerful modeling light, like the Ikelite DS125, to illuminate dimly lit corridors and cabins, though you should never depend solely on a strobe modeling light if penetrating a wreck. The ideal strobe for wreck shooters should recycle quickly (to ensure maximum productivity on a time-restricted dive), and should offer wide-angle coverage.
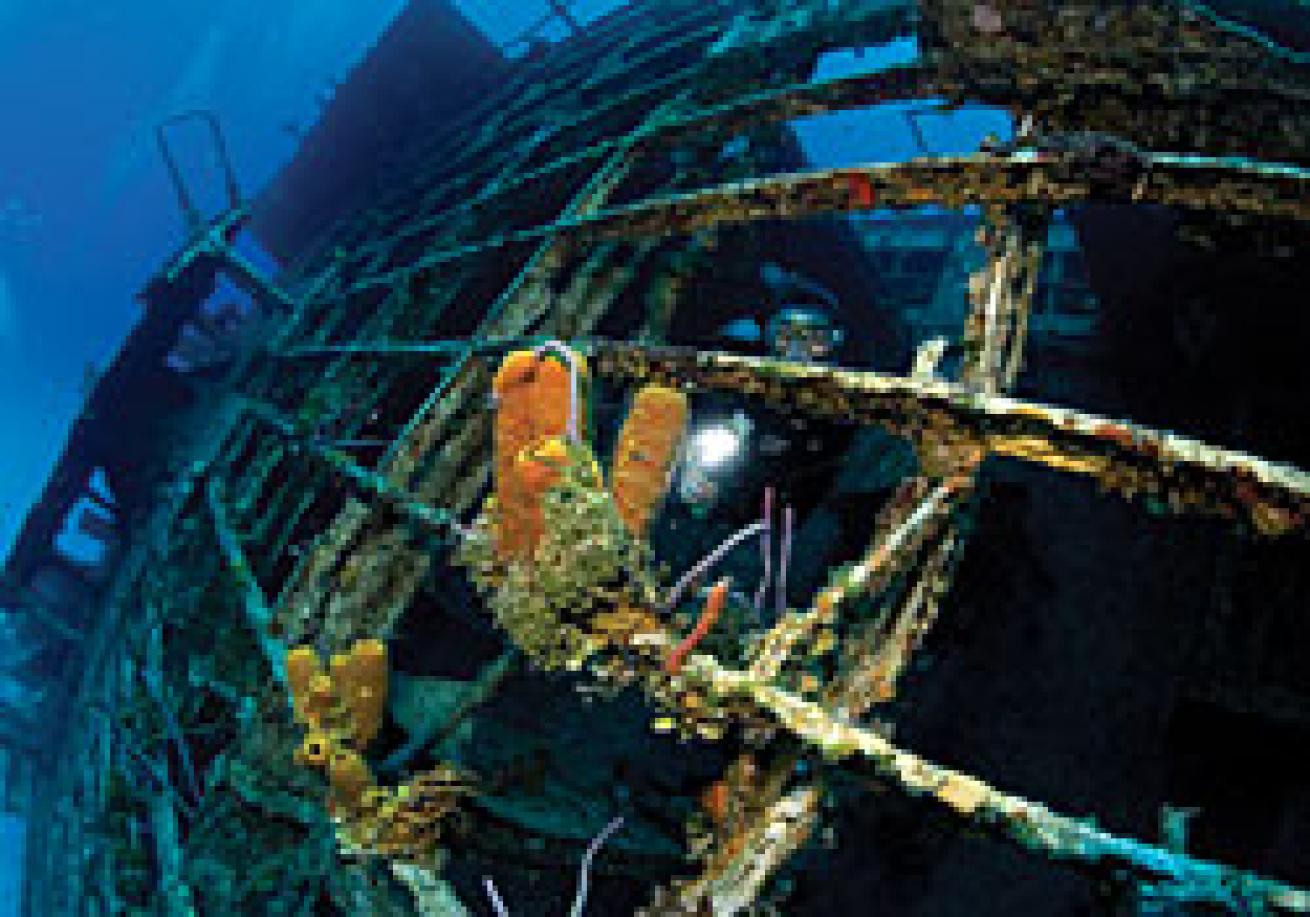
6 Know the Techniques
Most effective wreck photography requires blending strobe and ambient light. The strobe light makes the color in the foreground pop, adding contrast and detail to the composition. But with wreck photography, perhaps more than on the reef, the background is an important visual element. You may want a light-blue background streaming through a doorway, or a ship's tower to loom impressively in the distance. Generally speaking, a slower shutter speed might be necessary. Recognize that your strobe will synchronize with most cameras at 1/250th of a second and slower (check your camera manual to find the synch speed for your particular camera). So, while an f-stop of f-8 and half-power on the strobe setting might properly illuminate a clownfish and anemone in the foreground of a wreck, it might take 1/30th of a second shutter speed to open up the background to reveal a diver silhouette and ship detail.
7 Book a Model
A dive buddy willing to model, or better yet, an experienced dive model can add significant impact to wreck photos. A diver in the frame provides scale to show just how large that anchor or propeller might be, and colorful dive apparel can dress up an otherwise monochromatic scene. Further, the cast of a diver's eye or the direction of the beam of his dive light will direct the viewers' eye to the subject of interest in the composition. Of course, two divers on the scene creates twice the chance that errant fins or inopportune bubbles will create backscatter, but you need a dive buddy anyway, so it might as well be someone who is willing to pose. Because of the need to work quickly, either because of depth or the constraints of the overhead environment, quick and efficient nonverbal communication is crucial.
April 2007
Text and Photography by Stephen Frink
Whether they were run aground by storm or stupidity, whether they're warships that were sunk in battle or freighters that were cleaned and intentionally sunk as dive attractions, ships on the seafloor share a compelling element-each has a story that can be told through still images. In 25 years of photographing shipwrecks, I've learned a few valuable lessons. Here are seven tips for making your wreck photos the best they can be.
1 Be Conscious of Safety
Shipwrecks are often overhead environments with attendant hazards. Not all ships are penetrable, but those that are are essentially caves, with similar risks of entanglement or disorientation. Many of the best wrecks are also deep because ships that run aground in very shallow water are either salvaged or beat to smithereens by storm-driven waves.
The most accessible wrecks are in the 50- to 120-foot range, and because they are essentially square profiles, provide little opportunity for offgassing with a multi-level dive plan. Obey your computer and allow plenty of time for a safety stop at 15 feet. For more complex wrecks, study available maps, listen to the dive briefing, and consider safety precautions like the rule of thirds and using wreck lines. Even though you may have plenty of shots left on that eight-gigabyte memory card, safe bottom time has to trump your digital camera's image capacity. No photo is worth getting bent or killed for.
2 Know and Communicate the History
There is a story behind the sinking of every ship on the seafloor. Knowing a ship's backstory will help you capture the essence of the site. In Key Largo, the wreck of the Benwood was a casualty of World War II. It went down after colliding at night with the Robert C. Tuttle-both ships were navigating without lights to avoid the German U-boats that were prowling the South Florida coast. While it was later blown apart to prevent any hazard to navigation (the Benwood rests in only 25 to 40 feet of water), the bow still shows evidence of the accident that sealed its fate. Capturing that impact point in a wide-angle photo helps tell the Benwood's story. Likewise, the Japanese ships at the bottom of Truk Lagoon, sunk during World War II's Operation Hailstone, are full of artifacts of war and simple shipboard life. These wrecks are spectacular artificial reefs as well, emblazoned with soft corals and abundant marine life. But the guns, munitions and chinaware are all fascinating vignettes that complete a photographic story of these wrecks.
3 Don't Forget the Fish
Shipwrecks are wonderfully effective at attracting marine life, in some cases even more so than coral reefs. Their beams and doorways are often cloaked with corals and sponges, providing brilliantly colorful accents. Their myriad nooks and crannies provide a place for schooling fish to hide from the current or predators to lurk, awaiting unsuspecting prey. When the wreck is a self-contained environment, many fish seem reluctant to swim off into the blue to avoid a photographer, allowing better access to normally reclusive creatures. While much of wreck photography is wide-angle work, tighter compositions concentrating on a wreck's residents can be equally productive. Many wrecks even offer potential for macro photography, but the reality is that the big picture is so spectacular it is often hard to give up the fisheye lens for the macro optic.
4 Control Your Buoyancy and Breathing
Silt stirred up by a careless fin kick or sloppy buoyancy control can create backscatter and ruin a picture. Even worse, it can silt out a companionway to such an extent that it's easy to get disoriented. Obviously, the best wreck photographers have good diving skills. But even the best divers need to breathe, and exhalation bubbles can sometimes dislodge rust, silt and paint chips that rain down into the water column, ruining a photo's potential. When entering any overhead compartment, be prepared to work very quickly because you may get only a few shots before it is too dirty to continue. Before entering the shoot zone, have all shutter speed and aperture variables set, strobes properly positioned and breathing in control. If you do stir up silt, keep in mind that it takes at least 10 minutes or so for sediments to settle.
5 Bring the Tools
It usually takes a wide-angle lens to tell a wreck's story. The fisheye lens, like the 10.5mm Nikkor on a housed Nikon digital or the 15mm on a full-frame Canon, is excellent to show the size of a wreck, and to use forced perspective to make a gun emplacement or windlass seem even more impressive. However, the extreme barrel distortion of a lens like this might be problematic when showing a wheelhouse doorway. For more authentic rendering of the straight lines of a wreck, a versatile wide-angle zoom, like the Nikkor 12-24mm or Canon 17-40mm, is ideal. These lenses are great for capturing schooling fish as well, so they allow for the greatest range of imaging diversity on a single wreck dive.
The strobe is also very important to wreck photography. While some ships are shallow enough to shoot in available light, with or without filters, and other wrecks might be captured with an available-light "establishing shot" from a distance to show the general profile of the vessel, the photos taken on deck and inside compartments should be lit by strobe. I like a strobe with a powerful modeling light, like the Ikelite DS125, to illuminate dimly lit corridors and cabins, though you should never depend solely on a strobe modeling light if penetrating a wreck. The ideal strobe for wreck shooters should recycle quickly (to ensure maximum productivity on a time-restricted dive), and should offer wide-angle coverage.
6 Know the Techniques
Most effective wreck photography requires blending strobe and ambient light. The strobe light makes the color in the foreground pop, adding contrast and detail to the composition. But with wreck photography, perhaps more than on the reef, the background is an important visual element. You may want a light-blue background streaming through a doorway, or a ship's tower to loom impressively in the distance. Generally speaking, a slower shutter speed might be necessary. Recognize that your strobe will synchronize with most cameras at 1/250th of a second and slower (check your camera manual to find the synch speed for your particular camera). So, while an f-stop of f-8 and half-power on the strobe setting might properly illuminate a clownfish and anemone in the foreground of a wreck, it might take 1/30th of a second shutter speed to open up the background to reveal a diver silhouette and ship detail.
7 Book a Model
A dive buddy willing to model, or better yet, an experienced dive model can add significant impact to wreck photos. A diver in the frame provides scale to show just how large that anchor or propeller might be, and colorful dive apparel can dress up an otherwise monochromatic scene. Further, the cast of a diver's eye or the direction of the beam of his dive light will direct the viewers' eye to the subject of interest in the composition. Of course, two divers on the scene creates twice the chance that errant fins or inopportune bubbles will create backscatter, but you need a dive buddy anyway, so it might as well be someone who is willing to pose. Because of the need to work quickly, either because of depth or the constraints of the overhead environment, quick and efficient nonverbal communication is crucial.