How To Take Your Best Photos

February 2007
Text and Photography by Stephen Frink
1) Get The Most Out Of Your Digital Photos
Two words: shoot RAW. RAW is the camera quality setting that essentially captures all the information in the camera's computer. So, rather than having the camera make arbitrary decisions on the fly, discarding some information and compressing other information as it does when capturing images as JPG, shooting RAW creates an image analogous to the negative from our analog days.
If your camera efficiently allows the RAW option, embrace it. Many of the essential camera controls, including white balance, and to a great extent exposure and shadow detail, can be adjusted in the RAW protocol box of Photoshop CS2 far more effectively when the image is still in the RAW stage. A few simple adjustments to white balance and sliders for exposure, shadows, brightness and saturation make marked improvements to images, just as if they were originally shot this way.
2) Show Motion In Your Photographs
Most underwater images are discrete instances in time, frozen by strobe in what Henri Cartier-Bresson would describe as the "decisive moment." But it's a fluid environment underwater, and sometimes images can be enhanced by showing a bit (or even a lot) of motion.
Typically, slow shutter speeds are used to enhance the feel of motion. While a strobe may operate at 1/4,000th of a second, and a camera may synchronize as fast as 1/250th, the shooter still has the creative control to choose any shutter speed slower than that and still be in synch. The shutter can remain open, with either the subject moving, or the camera moving, or more likely both; and blur will result.
Usually it takes something slower than 1/30th of a second to illustrate intentional blur. After all, it needs to look like a purposeful effect rather than an accident. In order to use a shutter speed so slow, without overexposing, adjustment may be necessary in aperture (make it smaller so as not to overexpose ambient light). Shooting in situations of low available light (deep, overcast, or early morning or late afternoon light) permits slower shutter speeds as well. Panning (moving the camera in the direction of the subject's motion) during exposure will minimize the motion of the subject, while effectively blurring the background.
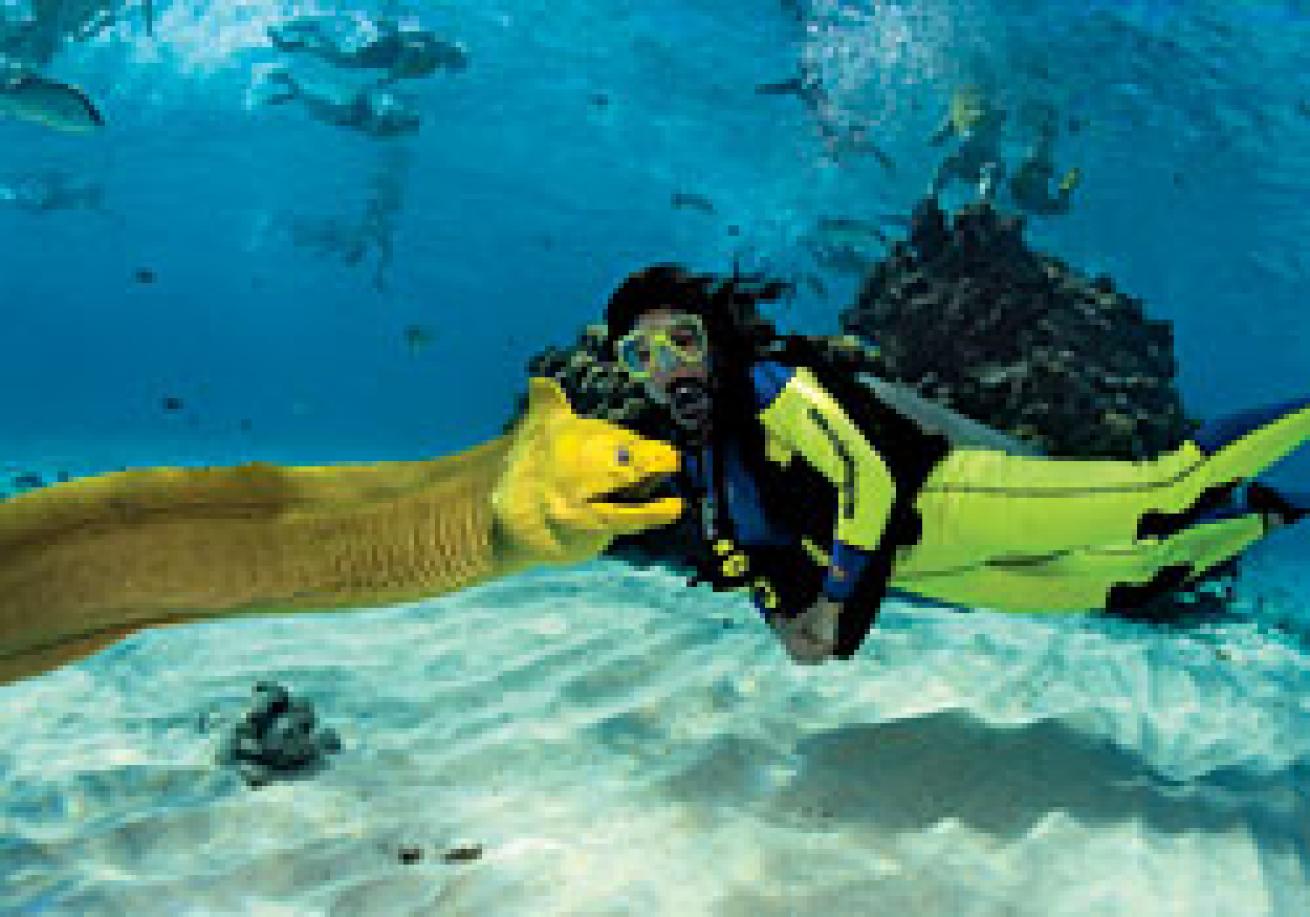
While a slow shutter speed will exaggerate the blur, the strobe will stop the action at a certain point during the exposure, as a function of the instantaneously rapid light burst. With a normal flash, the strobe fires at the beginning of the shutter curtain movement, thereby freezing the action. Then the subject continues to move, throwing the blur in front of the strobe-lit subject. A better technique is to program the camera for "rear-curtain synch" so that the strobe fires just as the shutter is completing its travel, and any blur is behind the sharply defined subject. With fish, for example, that better reveals important features like eyes and teeth.
3) Get More Color Without Strobe
Try a filter. UR-Pro (www.urprofilters.com) has designed two high-quality filters, one to work at 20 to 30 feet, and a shallow-water version to be used in 10 to 20 feet of blue water. In addition, pro photographers Alex Mustard and Peter Rowlands have done some innovative work with filters they specifically designed for shallow-water available-light photography. Called "Magic Filters" (www.magic-filters.com), their filters work with both digital SLR and point-and-shoot cameras, and they have recently developed an available-light filter optimized for shooting in the green waters of temperate climes.
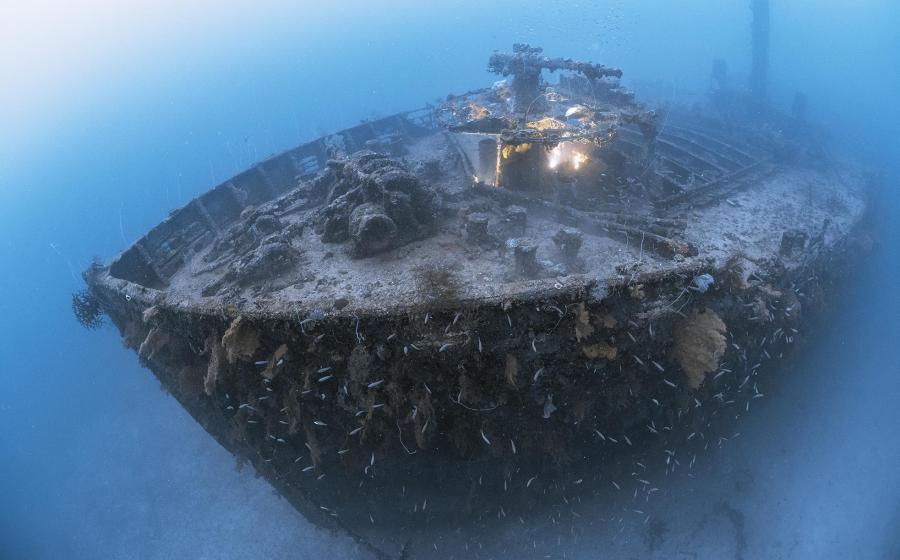
I find that these filters are quite effective for some limited imaging potential. Ideally, the depth should be 10 to 25 feet, and the sun should be behind the shooter's back in order to front-light the subject. A filter won't fill in the catchlights inside a facemask like a strobe would. On the other hand, a strobe won't add color to a shallow-water shipwreck 30 feet in the distance. In turbid water, a filter won't reveal backscatter like a strobe will. Knowing when to use filters is important, as you won't use them every dive, or even every trip.
4) Create Great Black-and-White Underwater Images
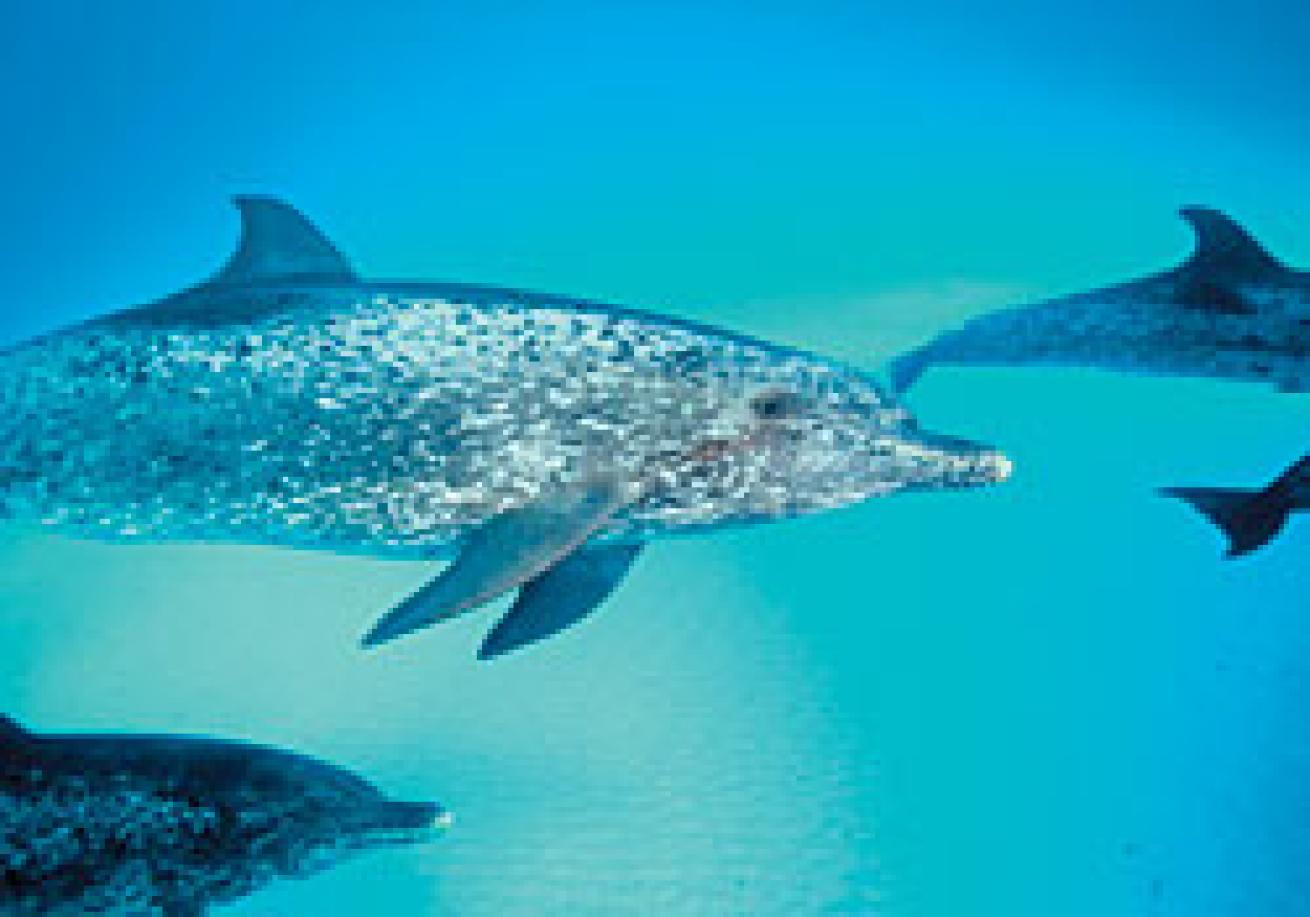
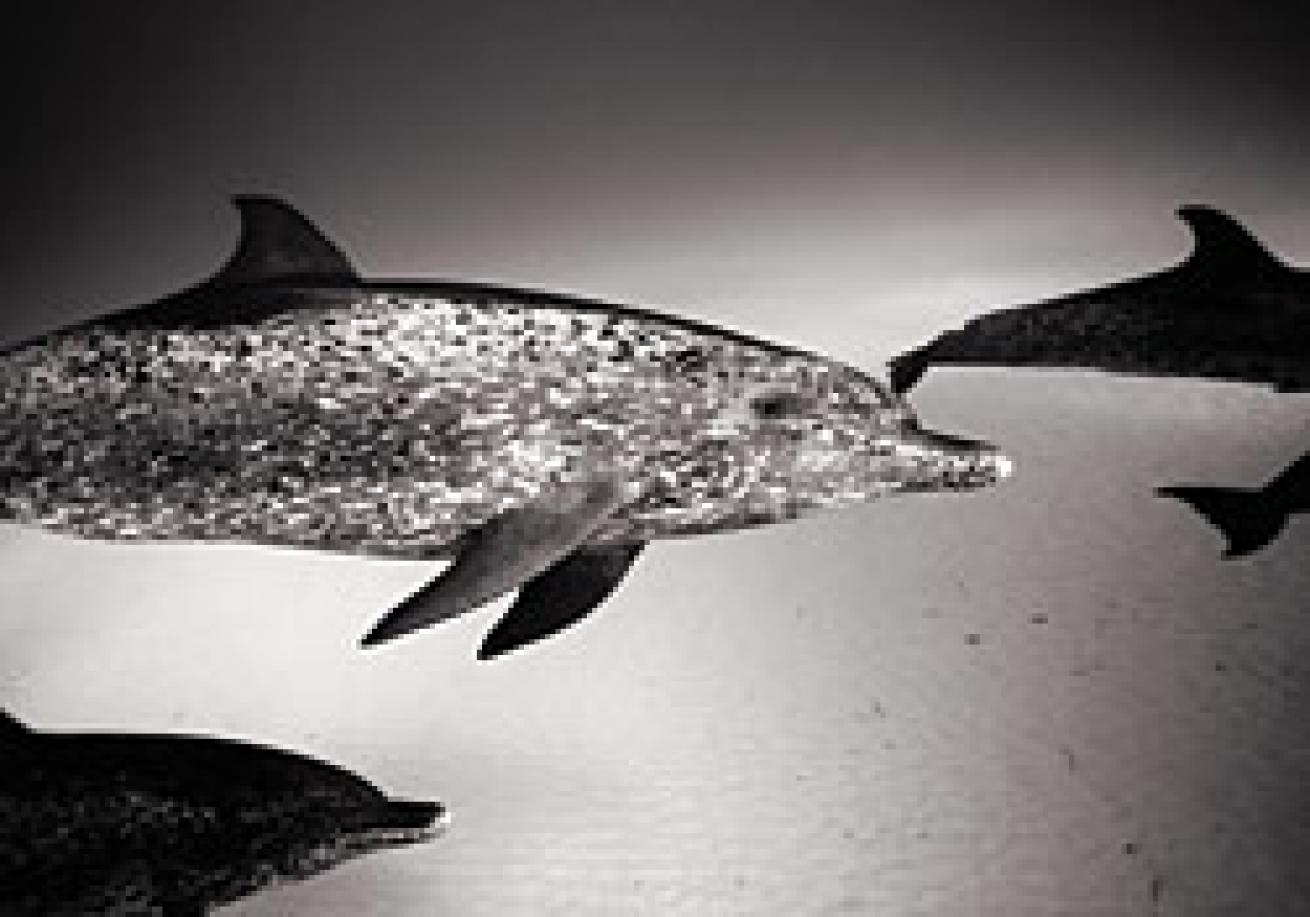
The most important part of a black-and-white underwater image is previsualization. Underwater photographers work in a fairly monochromatic environment of blues and blacks, until the moment we splash the scene with artificial light. Yet, some creatures and graphic shapes underwater do very well rendered as classic black-and-white compositions. Take the shot of spotted dolphins from the West End of Grand Bahama (above). In color, it is a lovely scene. But in black and white it is more striking, owing to the interplay of light in the background and gray-scale markings on the dolphin.
To get to this black-and-white version in Photoshop CS2 is absurdly easy. I just pulled the "saturation" slider all the way to the left in the RAW protocol box, and increased both contrast and shadow detail slightly (also slider controls). Once I hit "open" the image is very close to the finished file, but can be refined with normal Photoshop controls for levels or curves, and even color balance if the preference is for a warm tone black-and-white (like sepia) or something cooler to simulate a selenium wash in the traditional darkroom. There are many ways to get to black-and-white via Photoshop, but for quick and easy, and for the high quality that derives from working in RAW, this simple trick is very powerful.
5) Improve Point-and-Shoot Digital Photos
Get close. Putting too much water between camera and subject results in monochromatic photos. Remember, water is 600 times denser than air and serves as a filter of some color, typically cyan in clear tropical waters and green in temperate waters. Shrink the water column to enhance resolution and color.
Add an external flash. The small built-in flashes on most point-and-shoot cameras are inadequate for the job. Most of these cameras are better served with an external flash. The wild card is getting the flash to synchronize with the camera. Many point-and-shoot underwater housings don't have bulkhead sockets to hardwire a strobe, and their preflash protocol may make the cordless slave fire prematurely, before the strobe that actually illuminates the image for the camera.
Makers of external flashes for point-and-shoot cameras, including Ikelite, SeaLife and Sea & Sea, have expended considerable creative energy attacking this problem. SeaLife has a very clever new way to mount the fiber optic on its new DC600 that holds the "pipe" at right angles to the camera's internal flash, ensuring optimal light transmission, and Ikelite is developing its i35 AutoFlash as an external strobe ideally suited to most brands of point-and-shoots.
6) Optimize Wide-Angle Lens Performance With A Diopter
A diopter is a close-up lens; it magnifies and alters the close-focus ability of a lens. Diopters generally screw on the front of a lens and are used inside a housing. Some wide-angle zooms have to use diopters or they won't work underwater at all. The performance of some lenses, in combination with some dome ports, will be improved with the right diopter. But a diopter will change the infinity aspect of the composition; so if you need to hold focus on both the soft coral in the foreground and the diver silhouette in the background, the diopter may make it more difficult. The addition of a diopter also reduces a lens's angle of coverage. Both of these factors are compromises inherent with diopter use.
If your wide-angle zoom does not absolutely require a diopter to achieve proper minimum focus, do thorough in-water testing to see what strength diopter works best and under what situations it will render optical improvement.
When the action is fast and furious in front of the dome port, you need a lens that locks focus quickly and accurately. With some lenses, a diopter is essential to focus on the virtual image created by the dome; with other lenses, diopter use is a discretionary tool.
February 2007
Text and Photography by Stephen Frink
1) Get The Most Out Of Your Digital Photos
Two words: shoot RAW. RAW is the camera quality setting that essentially captures all the information in the camera's computer. So, rather than having the camera make arbitrary decisions on the fly, discarding some information and compressing other information as it does when capturing images as JPG, shooting RAW creates an image analogous to the negative from our analog days.
If your camera efficiently allows the RAW option, embrace it. Many of the essential camera controls, including white balance, and to a great extent exposure and shadow detail, can be adjusted in the RAW protocol box of Photoshop CS2 far more effectively when the image is still in the RAW stage. A few simple adjustments to white balance and sliders for exposure, shadows, brightness and saturation make marked improvements to images, just as if they were originally shot this way.
2) Show Motion In Your Photographs
Most underwater images are discrete instances in time, frozen by strobe in what Henri Cartier-Bresson would describe as the "decisive moment." But it's a fluid environment underwater, and sometimes images can be enhanced by showing a bit (or even a lot) of motion.
Typically, slow shutter speeds are used to enhance the feel of motion. While a strobe may operate at 1/4,000th of a second, and a camera may synchronize as fast as 1/250th, the shooter still has the creative control to choose any shutter speed slower than that and still be in synch. The shutter can remain open, with either the subject moving, or the camera moving, or more likely both; and blur will result.
Usually it takes something slower than 1/30th of a second to illustrate intentional blur. After all, it needs to look like a purposeful effect rather than an accident. In order to use a shutter speed so slow, without overexposing, adjustment may be necessary in aperture (make it smaller so as not to overexpose ambient light). Shooting in situations of low available light (deep, overcast, or early morning or late afternoon light) permits slower shutter speeds as well. Panning (moving the camera in the direction of the subject's motion) during exposure will minimize the motion of the subject, while effectively blurring the background.
While a slow shutter speed will exaggerate the blur, the strobe will stop the action at a certain point during the exposure, as a function of the instantaneously rapid light burst. With a normal flash, the strobe fires at the beginning of the shutter curtain movement, thereby freezing the action. Then the subject continues to move, throwing the blur in front of the strobe-lit subject. A better technique is to program the camera for "rear-curtain synch" so that the strobe fires just as the shutter is completing its travel, and any blur is behind the sharply defined subject. With fish, for example, that better reveals important features like eyes and teeth.
3) Get More Color Without Strobe
Try a filter. UR-Pro (www.urprofilters.com) has designed two high-quality filters, one to work at 20 to 30 feet, and a shallow-water version to be used in 10 to 20 feet of blue water. In addition, pro photographers Alex Mustard and Peter Rowlands have done some innovative work with filters they specifically designed for shallow-water available-light photography. Called "Magic Filters" (www.magic-filters.com), their filters work with both digital SLR and point-and-shoot cameras, and they have recently developed an available-light filter optimized for shooting in the green waters of temperate climes.
I find that these filters are quite effective for some limited imaging potential. Ideally, the depth should be 10 to 25 feet, and the sun should be behind the shooter's back in order to front-light the subject. A filter won't fill in the catchlights inside a facemask like a strobe would. On the other hand, a strobe won't add color to a shallow-water shipwreck 30 feet in the distance. In turbid water, a filter won't reveal backscatter like a strobe will. Knowing when to use filters is important, as you won't use them every dive, or even every trip.
4) Create Great Black-and-White Underwater Images
The most important part of a black-and-white underwater image is previsualization. Underwater photographers work in a fairly monochromatic environment of blues and blacks, until the moment we splash the scene with artificial light. Yet, some creatures and graphic shapes underwater do very well rendered as classic black-and-white compositions. Take the shot of spotted dolphins from the West End of Grand Bahama (above). In color, it is a lovely scene. But in black and white it is more striking, owing to the interplay of light in the background and gray-scale markings on the dolphin.
To get to this black-and-white version in Photoshop CS2 is absurdly easy. I just pulled the "saturation" slider all the way to the left in the RAW protocol box, and increased both contrast and shadow detail slightly (also slider controls). Once I hit "open" the image is very close to the finished file, but can be refined with normal Photoshop controls for levels or curves, and even color balance if the preference is for a warm tone black-and-white (like sepia) or something cooler to simulate a selenium wash in the traditional darkroom. There are many ways to get to black-and-white via Photoshop, but for quick and easy, and for the high quality that derives from working in RAW, this simple trick is very powerful.
5) Improve Point-and-Shoot Digital Photos
Get close. Putting too much water between camera and subject results in monochromatic photos. Remember, water is 600 times denser than air and serves as a filter of some color, typically cyan in clear tropical waters and green in temperate waters. Shrink the water column to enhance resolution and color.
Add an external flash. The small built-in flashes on most point-and-shoot cameras are inadequate for the job. Most of these cameras are better served with an external flash. The wild card is getting the flash to synchronize with the camera. Many point-and-shoot underwater housings don't have bulkhead sockets to hardwire a strobe, and their preflash protocol may make the cordless slave fire prematurely, before the strobe that actually illuminates the image for the camera.
Makers of external flashes for point-and-shoot cameras, including Ikelite, SeaLife and Sea & Sea, have expended considerable creative energy attacking this problem. SeaLife has a very clever new way to mount the fiber optic on its new DC600 that holds the "pipe" at right angles to the camera's internal flash, ensuring optimal light transmission, and Ikelite is developing its i35 AutoFlash as an external strobe ideally suited to most brands of point-and-shoots.
6) Optimize Wide-Angle Lens Performance With A Diopter
A diopter is a close-up lens; it magnifies and alters the close-focus ability of a lens. Diopters generally screw on the front of a lens and are used inside a housing. Some wide-angle zooms have to use diopters or they won't work underwater at all. The performance of some lenses, in combination with some dome ports, will be improved with the right diopter. But a diopter will change the infinity aspect of the composition; so if you need to hold focus on both the soft coral in the foreground and the diver silhouette in the background, the diopter may make it more difficult. The addition of a diopter also reduces a lens's angle of coverage. Both of these factors are compromises inherent with diopter use.
If your wide-angle zoom does not absolutely require a diopter to achieve proper minimum focus, do thorough in-water testing to see what strength diopter works best and under what situations it will render optical improvement.
When the action is fast and furious in front of the dome port, you need a lens that locks focus quickly and accurately. With some lenses, a diopter is essential to focus on the virtual image created by the dome; with other lenses, diopter use is a discretionary tool.