A Beginner's Guide to Underwater Digital Video

My first dive trip was to the Bahamian island of Bimini. Wanting some underwater pictures for souvenirs, I bought an Ikelite AquaShot camera. Joining us that first trip was a member of our dive club who was a professional photographer and videographer who was shooting underwater video.
Camera: Digital is the way to go these days. Digital video cameras may seem expensive until you consider the major expense of editing analog video. Housings for analog cameras, while still available, are getting scarce.
At the end of the trip, he sold us the video of our week's diving. I was blown away. Simple as that. I also wanted to make a living record of my dives. Now, about 800 dives later, most of them shooting video, I'm on my third setup, this one digital. I'm poor but hooked.
Why Video Instead of Stills?
Because of three significant advantages:
Cost: If you get nothing decent on video, you didn't waste film, batteries (both reusable with video) or money on processing.
Ease of Use: Equipment for stills and video is obtrusive to the dive experience, but for me video is less so. Set the camera on auto focus and auto exposure, start recording, pause, record. There are no f-stops, strobe settings or lens selections to worry about. You can use manual focus, manual exposure and white balance if you want, but for most video shots, these are unnecessary. Of course there is still subject framing, light location and that intangible, artistic talent, but those remain a constant whether you are shooting video or stills.
More Memories: For me, a video can give you more vivid memories, including movement and sound, of the entire vacation experience, above and below the water. It is also possible to capture video stills and print them for mounting on the wall, granted not at the quality of a good still camera setup.
What Equipment Do I Need?

Size is another consideration. Some camera manufacturers have digital mini-cameras that are extremely small, e.g., the Sony PC-110 and Canon Optura. These are great for traveling.
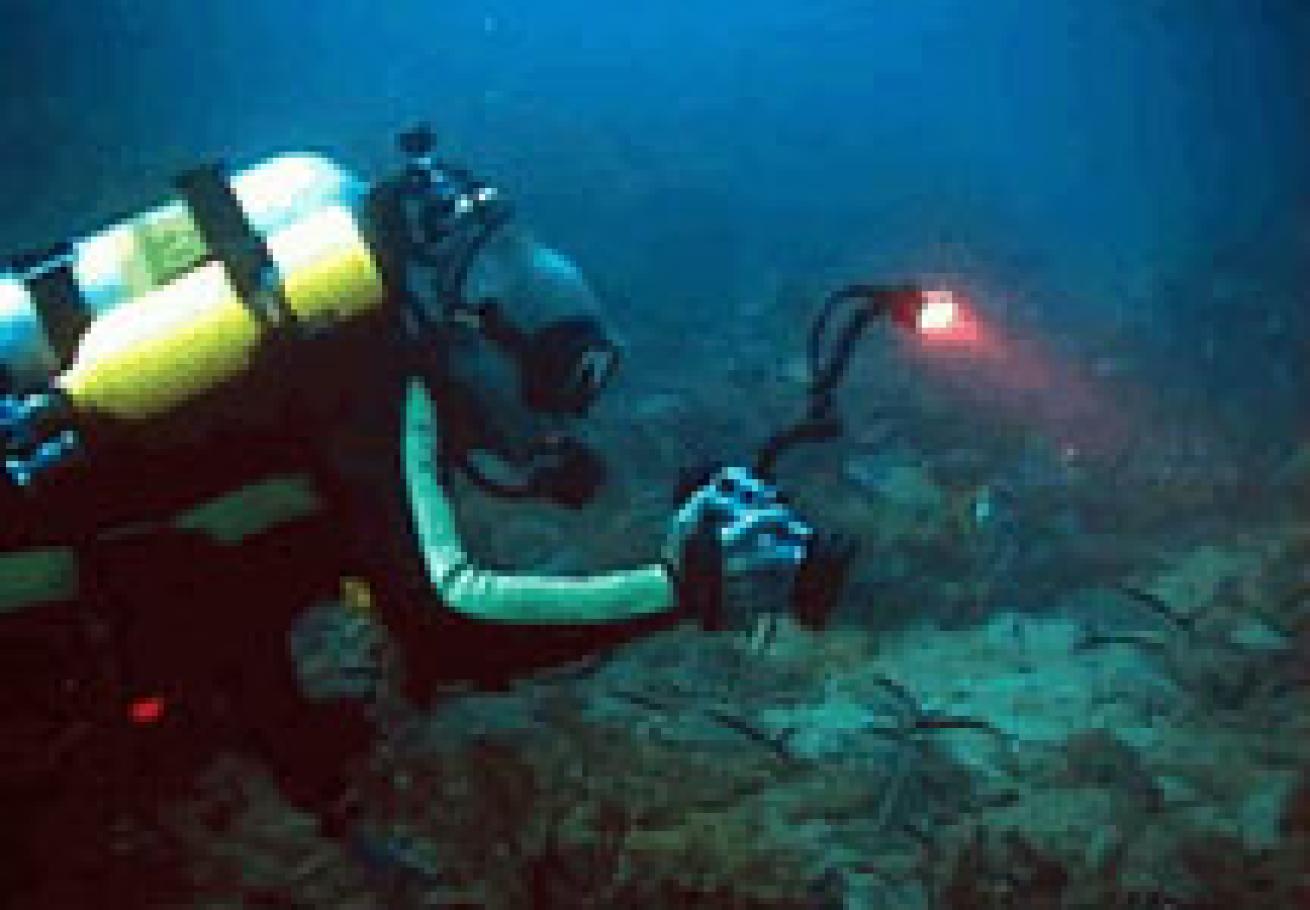
Housing: Before you make a final decision on a camera, make sure somebody supplies an underwater housing for it. More manufacturers make housings for Sony cameras than any other brand. Sony makes everything from inexpensive Hi8 Digital to three-chip MiniDV, and there are housings available for most of them. There are certainly other good camera options with housings available, but they are limited. Finally, be wary of any "universal" mechanical housing. Instead, get a housing specifically designed for your camera choice.
Video Ports: The video port on the housing is usually not a concern. Most housings come with a wide-angle port. There are other options, but for starters, this is sufficient. Just be sure the housing has a glass port. Plastic ports will soon be scratched in the scuba diving environment.
Video Lights: While not a necessity for shooting during the day, lights will make your close-up video look much better. The red filter will bring back some of the red lost to depth, but not all of it. However, just like a strobe, no video light will work during the day at a distance beyond five to eight feet. You will still use the filter for distance shots.
Video lights are expensive, $500 to several thousand dollars, and come in many styles. HID lights are the latest craze. They are expensive but compact and the batteries long-lasting. I shot video for two years without lights with good results, but when you get close to your subject, the result of having lights is well worth the expense. Trying to shoot video at night using your standard underwater light just does not work well.
Editing
Editing is where shooting digital offers some significant advantages: (1) To make a VHS tape using analog video, you need several pieces of expensive equipment. (2) Each time you copy an analog video, there is a quality loss, even when copying from the camera to VHS tape, especially when using VHS or 8mm. (3) Adding titles and a soundtrack will require more equipment, such as a title insertion device and an editing VCR.
By contrast, if you're shooting digital, all you need for basic editing is a Firewire (IEEE 1394) board in a fairly fast PC (1Ghz or faster) with a good size hard drive (30GB).
There are many PC-based editing software packages available at a variety of prices. A good PC option for entry level is Pinnacle Studio DV, which comes with the Firewire card and costs around $100. Other options can take you all the way up to Adobe Premier, which is an awesome program, although expensive. There are also many pre-built video editing PCs available, including Sony Vaio, Dell and the new Apples.
With a PC-based editing program, you input the raw video from the camera, do the editing cuts, clip arrangement, add transitions, titles and a soundtrack, then either output it back to your camera for transfer to VHS or straight to VHS, depending on the hardware in the PC.
Keep your clips small on your finished video unless it is something special like a moray killing a parrotfish or that great white shark; otherwise your audience will get bored. Five- to 10-second clips are good. You can find a good example of editing using short clips at http://dejavideo.net/coz2.wmv Warning: If you want to download this file, it is large (6.2MB).
Adding a soundtrack can greatly enhance the final product. I prefer to use instrumental music. I think lyrics distract the viewer from the visuals. Regarding music, beware of copyright violations. Royalty-free music is available from many sources; search the Internet for "needle drop music."
Shooting the Video: Dale's Top 10 Tips
| The Price of Digital | ||||||||||||
| Your First Setup You can save a lot of money by shopping around for the individual pieces. I have found that buying from a catalog company can save time and money as well as ensure that all the pieces work together. My picks, from the basic setup to the dream setup: Budget Package Sony DCRTR120 Digital-8 Camcorder | $600 | |||||||||||
| Ocean Images Dolphin Pro | $1,050 | |||||||||||
| NiteRider Vector 1 Video lights | $600 | |||||||||||
| Pinnacle Studio DV IEEE-1394 editing | $100 | |||||||||||
| Total | $2,350 |
Dream Setup
| Sony DCRVX-2000 Digital Camcorder | $2,000 |
| Amphibico VH2000 Housing | $3,800 |
| StingRay Pro HID Video lights | $3,000 |
| Sony Vaio MX Desktop Video Editing | $3,000 |
| Total | $11,800 |
Sony DCRVX-2000 Digital Camcorder $2,000 Amphibico VH2000 Housing $3,800 StingRay Pro HID Video lights $3,000 Sony Vaio MX Desktop Video Editing $3,000 Total $11,800
Note: Prices are approximate for comparison. Packages include underwater housing with wide-angle lens and color-correcting filter, camera and video lights with battery and charger. 1) Steady as she goes. The first and most important skill to master is holding the camera steady. You'll probably blow a few dives until you master this. Buoyancy control and practice are the keys.
2) Keep it slo-mo. If you must pan or zoom, do it very slowly. You don't want your audience getting seasick or hurting their necks.
3) Seeing red. It's easy to ruin a beautiful scene by forgetting to use or remove the red filter at appropriate times.
4) Avoid "Churching." This is thinking the camera is paused when it is actually recording and vice versa. I was told this was named for underwater video pioneer Jim Church. Regardless, we all do it.
5) Up, up and away. Try to shoot up away from the bottom as much as possible; it just looks better. Try not to shoot too much fish butt. It's tough, but if you're patient and quiet (breathe very quietly), the fish will ignore you and you will be able to get natural-looking shots.
6) Be the fish. Allow the subject to enter the scene and exit the scene without moving the camera, or allow the fish to swim behind something before pausing the camera.
7) Shoot silhouettes. Silhouettes of fish, coral or divers at the top of a wall add drama and variety.
8) Get close. Then get closer. This is where buoyancy control becomes essential. If you want dramatic effects, you must get close. Nothing brings out the oohs and ahs like a close-up of a moray's teeth!
9) Know your audience. Try to shoot the video your audience will want to see. If they want the whole vacation, make sure you get them on video above and below water, divers on the boat, entering the water and interfacing with the critters and each other.
10) Be polite. Do not take video of somebody who does not want you to. And don't let your excitement lead you to barge in with your camera to get a shot in front of divers already there enjoying it.

My first dive trip was to the Bahamian island of Bimini. Wanting some underwater pictures for souvenirs, I bought an Ikelite AquaShot camera. Joining us that first trip was a member of our dive club who was a professional photographer and videographer who was shooting underwater video.
At the end of the trip, he sold us the video of our week's diving. I was blown away. Simple as that. I also wanted to make a living record of my dives. Now, about 800 dives later, most of them shooting video, I'm on my third setup, this one digital. I'm poor but hooked.
Why Video Instead of Stills?
Because of three significant advantages:
Cost: If you get nothing decent on video, you didn't waste film, batteries (both reusable with video) or money on processing.
Ease of Use: Equipment for stills and video is obtrusive to the dive experience, but for me video is less so. Set the camera on auto focus and auto exposure, start recording, pause, record. There are no f-stops, strobe settings or lens selections to worry about. You can use manual focus, manual exposure and white balance if you want, but for most video shots, these are unnecessary. Of course there is still subject framing, light location and that intangible, artistic talent, but those remain a constant whether you are shooting video or stills.
More Memories: For me, a video can give you more vivid memories, including movement and sound, of the entire vacation experience, above and below the water. It is also possible to capture video stills and print them for mounting on the wall, granted not at the quality of a good still camera setup.
What Equipment Do I Need?

Camera: Digital is the way to go these days. Digital video cameras may seem expensive until you consider the major expense of editing analog video. Housings for analog cameras, while still available, are getting scarce.
Size is another consideration. Some camera manufacturers have digital mini-cameras that are extremely small, e.g., the Sony PC-110 and Canon Optura. These are great for traveling.
Housing: Before you make a final decision on a camera, make sure somebody supplies an underwater housing for it. More manufacturers make housings for Sony cameras than any other brand. Sony makes everything from inexpensive Hi8 Digital to three-chip MiniDV, and there are housings available for most of them. There are certainly other good camera options with housings available, but they are limited. Finally, be wary of any "universal" mechanical housing. Instead, get a housing specifically designed for your camera choice.
Video Ports: The video port on the housing is usually not a concern. Most housings come with a wide-angle port. There are other options, but for starters, this is sufficient. Just be sure the housing has a glass port. Plastic ports will soon be scratched in the scuba diving environment.
Video Lights: While not a necessity for shooting during the day, lights will make your close-up video look much better. The red filter will bring back some of the red lost to depth, but not all of it. However, just like a strobe, no video light will work during the day at a distance beyond five to eight feet. You will still use the filter for distance shots.
Video lights are expensive, $500 to several thousand dollars, and come in many styles. HID lights are the latest craze. They are expensive but compact and the batteries long-lasting. I shot video for two years without lights with good results, but when you get close to your subject, the result of having lights is well worth the expense. Trying to shoot video at night using your standard underwater light just does not work well.
Editing
Editing is where shooting digital offers some significant advantages: (1) To make a VHS tape using analog video, you need several pieces of expensive equipment. (2) Each time you copy an analog video, there is a quality loss, even when copying from the camera to VHS tape, especially when using VHS or 8mm. (3) Adding titles and a soundtrack will require more equipment, such as a title insertion device and an editing VCR.
By contrast, if you're shooting digital, all you need for basic editing is a Firewire (IEEE 1394) board in a fairly fast PC (1Ghz or faster) with a good size hard drive (30GB).
There are many PC-based editing software packages available at a variety of prices. A good PC option for entry level is Pinnacle Studio DV, which comes with the Firewire card and costs around $100. Other options can take you all the way up to Adobe Premier, which is an awesome program, although expensive. There are also many pre-built video editing PCs available, including Sony Vaio, Dell and the new Apples.
With a PC-based editing program, you input the raw video from the camera, do the editing cuts, clip arrangement, add transitions, titles and a soundtrack, then either output it back to your camera for transfer to VHS or straight to VHS, depending on the hardware in the PC.
Keep your clips small on your finished video unless it is something special like a moray killing a parrotfish or that great white shark; otherwise your audience will get bored. Five- to 10-second clips are good. You can find a good example of editing using short clips at http://dejavideo.net/coz2.wmv Warning: If you want to download this file, it is large (6.2MB).
Adding a soundtrack can greatly enhance the final product. I prefer to use instrumental music. I think lyrics distract the viewer from the visuals. Regarding music, beware of copyright violations. Royalty-free music is available from many sources; search the Internet for "needle drop music."
Shooting the Video: Dale's Top 10 Tips
|||||||||||||| |---|---|---|---|---|---|---|---|---|---|---|---|---|
|**The Price of Digital**|
| **Your First Setup** You can save a lot of money by shopping around for the individual pieces. I have found that buying from a catalog company can save time and money as well as ensure that all the pieces work together. My picks, from the basic setup to the dream setup: **Budget Package**
|
1) Steady as she goes. The first and most important skill to master is holding the camera steady. You'll probably blow a few dives until you master this. Buoyancy control and practice are the keys.
2) Keep it slo-mo. If you must pan or zoom, do it very slowly. You don't want your audience getting seasick or hurting their necks.
3) Seeing red. It's easy to ruin a beautiful scene by forgetting to use or remove the red filter at appropriate times.
4) Avoid "Churching." This is thinking the camera is paused when it is actually recording and vice versa. I was told this was named for underwater video pioneer Jim Church. Regardless, we all do it.
5) Up, up and away. Try to shoot up away from the bottom as much as possible; it just looks better. Try not to shoot too much fish butt. It's tough, but if you're patient and quiet (breathe very quietly), the fish will ignore you and you will be able to get natural-looking shots.
6) Be the fish. Allow the subject to enter the scene and exit the scene without moving the camera, or allow the fish to swim behind something before pausing the camera.
7) Shoot silhouettes. Silhouettes of fish, coral or divers at the top of a wall add drama and variety.
8) Get close. Then get closer. This is where buoyancy control becomes essential. If you want dramatic effects, you must get close. Nothing brings out the oohs and ahs like a close-up of a moray's teeth!
9) Know your audience. Try to shoot the video your audience will want to see. If they want the whole vacation, make sure you get them on video above and below water, divers on the boat, entering the water and interfacing with the critters and each other.
10) Be polite. Do not take video of somebody who does not want you to. And don't let your excitement lead you to barge in with your camera to get a shot in front of divers already there enjoying it.


