The Snakebit Photo Trip

September 2007
Text and Photography by Stephen Frink
So, you've planned and eagerly anticipated that one special dive trip all year and have worked out a full gallery of stunning underwater images in your mind's eye, only to arrive on location and find it's raining steadily, or the visibility sucks, or the fish are incredibly skittish, or the currents are too strong, or any of a dozen other conditions that can step on your ability to get the hoped-for photos. What next?
This is on my mind now because I recently took such a trip to a destination that's hot among underwater photographers. I was expecting greatness, but we experienced pretty bad visibility during the week, had no amazing pelagic encounters, and suffered some boat issues that limited the range and duration of our trip. I've seen what other photographers have brought home from this destination and know that it can be great, but that wasn't the hand I was dealt the week I was there.
Still, I was able to come home with some terrific shots, but only because I shifted mindset, target species and optics. My pre-trip ideas of what I was going to shoot was out of sync with the reality of the destination that week, but by being nimble and realigning priorities, I came home with some great new additions to my portfolio. Here are some tips to help you prepare for those times when the photographic challenges seem overwhelming:
Have The Tools For The Job
On my trip, I really wanted to concentrate on wide-angle, in particular schooling fish and massive soft-coral colonies. But a combination of overcast conditions and poor visibility made that impractical on some days. The terrain was absolutely stunning, and in some places there wasn't a square inch of substrate that wasn't covered by some photogenic mass of colorful filter feeders. But without light and water clarity, I couldn't communicate the vast spectacle of the reef scene.
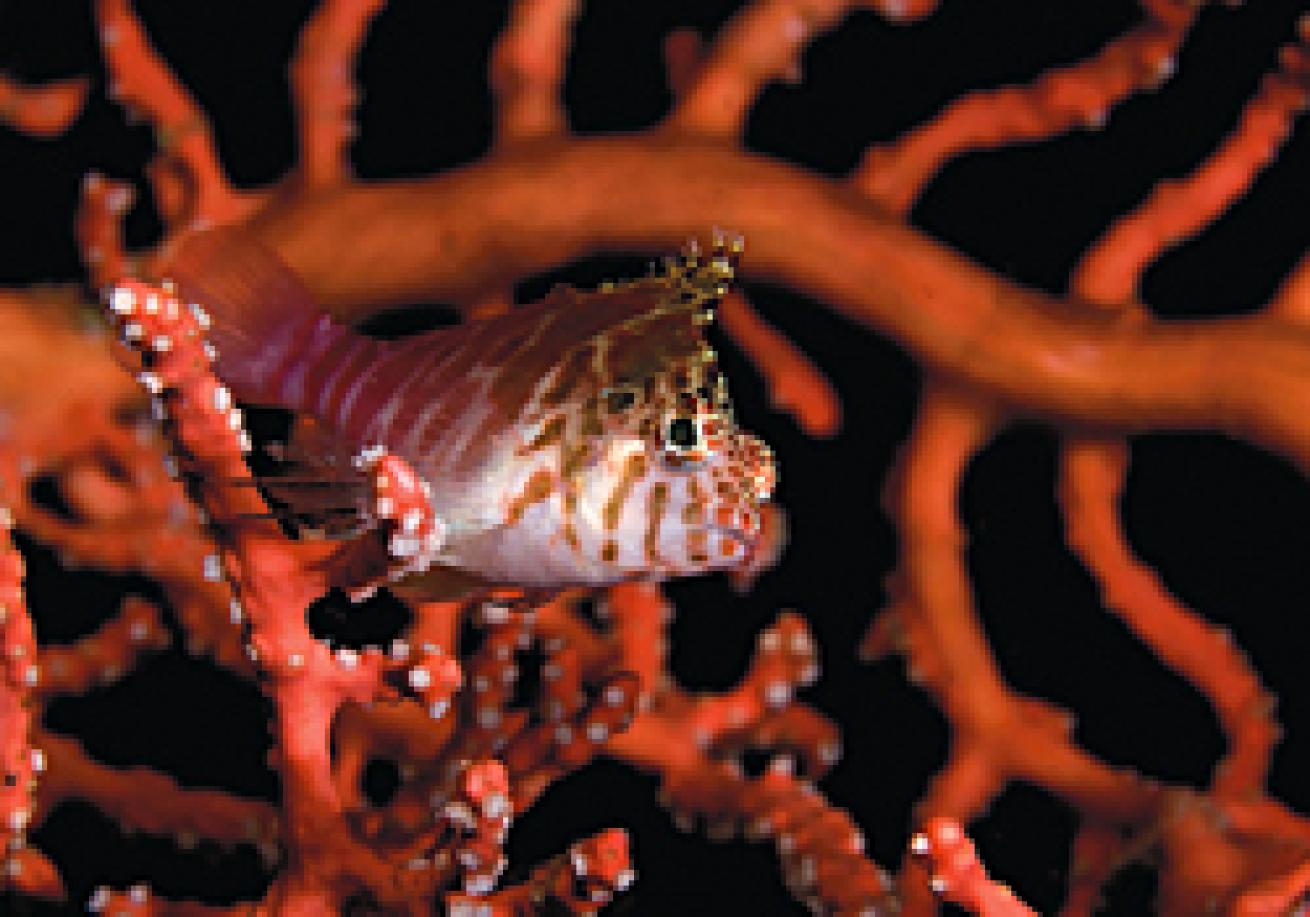
Rather than waste finite photo opportunities on what might have been, I changed lenses and changed priorities, from wide-angle to fish and macro shots. One thing I've learned over the years is that you have to go on location prepared to shoot the big three: macro, fish portraits and wide-angle. You can predict what the destination will likely deliver. For example, in Cozumel you can expect that you'll have great wide-angle in clear water, and rich marine life on the medium-depth reefs. You probably won't shoot a lot of macro there. On the other hand, you might find a splendid toadfish at a cleaning station that is a world-class macro shot. Be prepared for any eventuality, and mount the tool that best fits the environment.
A Nikon shooter, with the 1.5 cropped sensor on a D2X or a D200, can actually cover most things on most reefs with only two lenses, a 12-24mm zoom and a 60mm Micro-Nikkor. Discretionary lenses would add something even wider, like the 10.5mm fisheye to expand coverage for shipwrecks and big pelagic life and a 105mm Micro-Nikkor to help capture the reef's minutiae. Canon has similar lenses for both cropped or full-frame sensors. A point-and-shoot digital may not have interchangeable lenses, but the native optics do an excellent job with fish portraits and even close-up photography. Some housing manufacturers (particularly Light & Motion, Ikelite, SeaLife, and Sea & Sea) recognize that these cameras need help for wide-angle and offer easy means to attach supplementary wide-angle adapters while underwater. To cover the diversity of life found on the coral reef, and to be ready to react to local conditions, make sure your camera housing is adaptable and you have the accessories necessary to cover the big three.
Avoid Gear Snafus
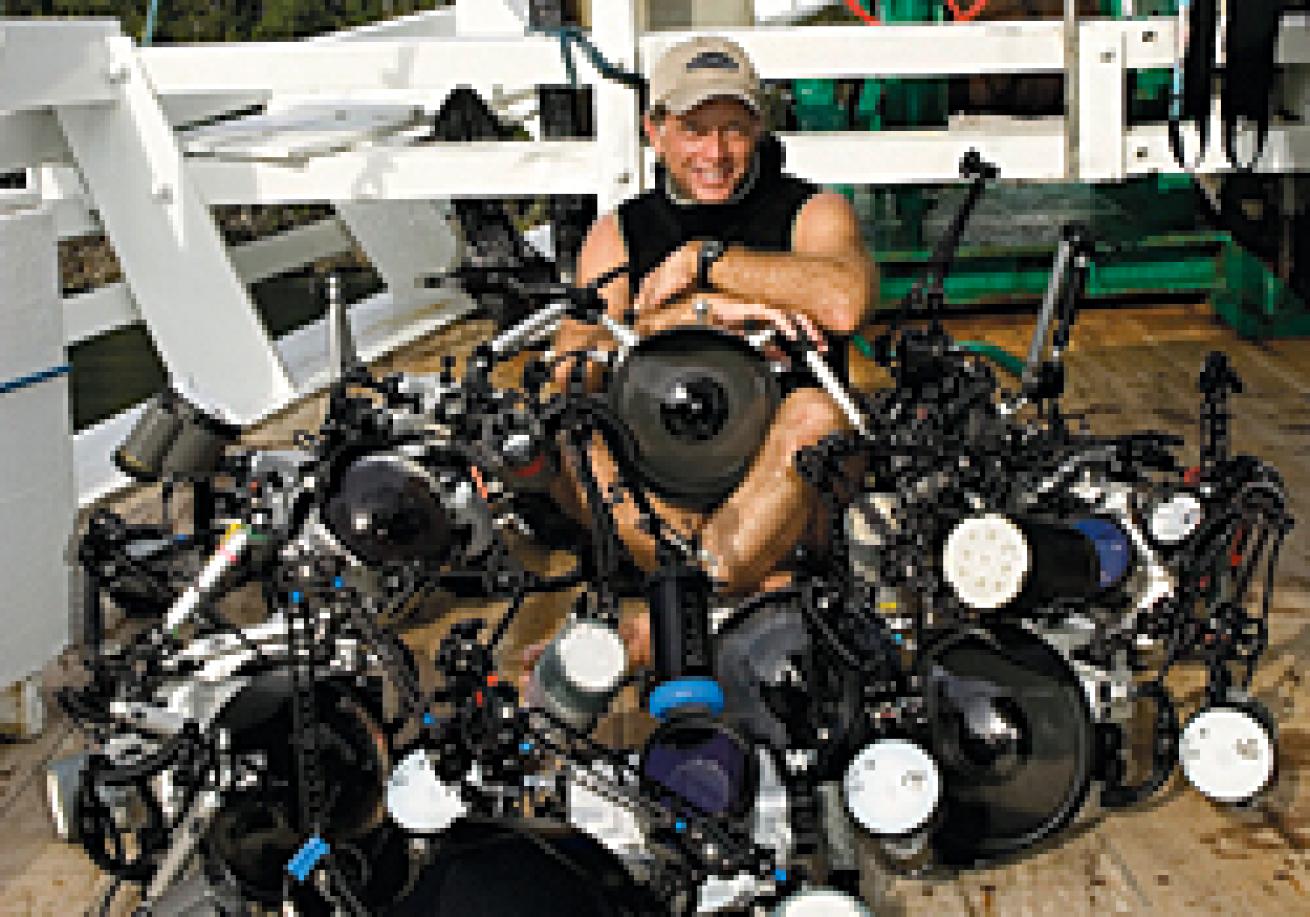
Be gear-redundant. For a digital SLR shooter, that means, at the very least, two of the same camera bodies and multiple strobes. Even the very best underwater camera housing can flood because of user error. Most housings are primarily mechanical, made of materials that don't corrode and can be rinsed with fresh water, dried and be ready to go again 30 minutes after even a calamitous flood. But cameras and lenses are quickly ruined by saltwater immersion. Having a second camera body allows you to shoot topside while the other camera is snuggled inside the housing and, more importantly, provides backup in case of mechanical failure.
Dropping and jostling your strobes while you're traveling is as hard on them as in-water use, probably more so. To that end, I usually take a minimum of three strobes with me on location, more for longer shoots. That provides dual strobe lighting and one spare when all goes well, and it would take the bad luck of two strobes going down to force me to shoot with a single strobe.
Another vulnerable component is the strobe cord. Delicate wires and pins can break or corrode in normal use. While it wasn't exactly normal use, during a recent session shooting over/unders of sharks off the back of a boat, I had three strobe cords chewed through by rowdy sharks. The need for spare strobe cords is a fact of life for the traveling underwater photographer.
Absorb The Dive Briefing
Except for those compact digitals with their supplementary lenses, you can't change lenses underwater. The single best source of information for what you'll be able to shoot on any dive is the briefing. If the briefing is all about pygmy seahorses and ghost pipefish, it might be a good dive to load the 100mm macro into the housing.
The divemaster giving the briefing may or may not know anything about underwater photography. You may have to ask questions to extract enough from his local knowledge to suit your needs. In order to choose the right lens to make the dive optimally productive, you may need to know visibility, current flow, bottom terrain and probable resident marine life. These guys dive these same reefs week after week, and they should be able to reasonably predict these variables. Still, there can and will be surprises once you get on the reef. You might wish you had a different lens, but by putting the probability in your favor by listening and asking the right questions, you'll no doubt have plenty of interesting subjects to photograph, despite the inevitable frustration of seeing the pygmy seahorse giving birth while diving with your 180-degree fisheye.
React When Conditions Are Favorable
Think about the shots that depend most on good conditions, and make those the No. 1 priority as conditions permit. If the sun is shining and the water is clear, even on the first day of the trip, try to get those important wide-angle shots that "tell the story." That sunshine or clear water may not stick around for the week. Macro shots and fish portraits can be captured under almost any light conditions, and even in marginal visibility, so, all things being equal, put off shooting the vignettes until a few of the establishing shots are in the can. The same goes for topside shots of the boat, resort or island. You can never predict what tomorrow might bring, so cover as much of the sunshine-dependent images as you can, when you can. Procrastinators will eventually get burned when wind or rain kicks in before the story-in-pictures is told.
Back Up Your Digital Files
One of the worst things that can happen on a photo trip is losing days of productive imaging due to a computer malfunction. The safest way manage digital images on location is to simultaneously download from the card to both a laptop computer and external hard drive by means of browsing software. I try to do a fairly aggressive edit daily from the files archived on the laptop so that at the end of the week the marginal images are already culled and the file is manageable and quick to review. But I like to have an unedited folder still residing on my portable hard drive, just in case of an overzealous delete key. The reality is that I normally dump the unedited shoot in favor of the edited version as soon as I get home, but it is nice to have the option to revisit everything from a particular setup should I have second thoughts about the coverage.
Photo Etiquette Revisited
I saw a recent forum post on wetpixel.com from Bill Vanant in response to an article on photo etiquette I wrote in the March issue of Scuba Diving:
Stephen Frink suggested that an underwater scene belonged to the photographer until he was done shooting. While that sounds nice, I am sure that there must be some limits. On a recent trip to Lembeh, my wife and I were diving with a group from Turkey, and these guys were unbelievable. You could see where they were from 100 feet away simply by looking for the cloud of dust where the three of them were shooting, looking like Custer's last stand. They would literally shoot at least 50 pictures each of some scorpionfish or frogfish or whatever. After shooting for 10 to 12 minutes, they would then turn around in a big cloud and swim off, leaving the poor fish blinded by flash and the water too murky for anyone else to shoot or video the scene. On a previous trip we dived with a couple, both photographers, and we worked out a deal: three pics each, then go to the back of the line for three more, repeating the process until you got one you liked and moved on. Given the relatively unlimited capacity now of digital cameras, where do you draw the line on how long to shoot a subject, particularly with a group that has four or five people trying to get something nice?
There are indeed limits, or should be anyway. Some animals can't stand repeated photographic intrusion, and it's wrong to compromise the well-being of a fish or critter for the sake of a photograph. In addition, photo-ops that are initiated by a guide who may be responsible for a small group of people is different from a photo-op created by one's own personal eye and happenstance.
I should have thought through all these permutations and the additional variable of the virtually limitless capacity the new eight-gigabyte cards bring to digital imaging. I still believe a photographer who finds a particular subject on his or her own should be allowed to properly cover the opportunity without distraction or interruption from another photographer trying to replicate the setup. But in a group scenario, especially where a critter-finder is tasked to point out subjects of interest to several divers at a time, common sense and polite behavior should trump "finders keepers." Take a few shots, leave the scene gently without creating a cloud of sand, and if the shot is important enough (and the subject robust enough), hang out in the vicinity so you can return and shoot it after the group has moved on.
September 2007
Text and Photography by Stephen Frink
So, you've planned and eagerly anticipated that one special dive trip all year and have worked out a full gallery of stunning underwater images in your mind's eye, only to arrive on location and find it's raining steadily, or the visibility sucks, or the fish are incredibly skittish, or the currents are too strong, or any of a dozen other conditions that can step on your ability to get the hoped-for photos. What next?
This is on my mind now because I recently took such a trip to a destination that's hot among underwater photographers. I was expecting greatness, but we experienced pretty bad visibility during the week, had no amazing pelagic encounters, and suffered some boat issues that limited the range and duration of our trip. I've seen what other photographers have brought home from this destination and know that it can be great, but that wasn't the hand I was dealt the week I was there.
Still, I was able to come home with some terrific shots, but only because I shifted mindset, target species and optics. My pre-trip ideas of what I was going to shoot was out of sync with the reality of the destination that week, but by being nimble and realigning priorities, I came home with some great new additions to my portfolio. Here are some tips to help you prepare for those times when the photographic challenges seem overwhelming:
Have The Tools For The Job
On my trip, I really wanted to concentrate on wide-angle, in particular schooling fish and massive soft-coral colonies. But a combination of overcast conditions and poor visibility made that impractical on some days. The terrain was absolutely stunning, and in some places there wasn't a square inch of substrate that wasn't covered by some photogenic mass of colorful filter feeders. But without light and water clarity, I couldn't communicate the vast spectacle of the reef scene.
Rather than waste finite photo opportunities on what might have been, I changed lenses and changed priorities, from wide-angle to fish and macro shots. One thing I've learned over the years is that you have to go on location prepared to shoot the big three: macro, fish portraits and wide-angle. You can predict what the destination will likely deliver. For example, in Cozumel you can expect that you'll have great wide-angle in clear water, and rich marine life on the medium-depth reefs. You probably won't shoot a lot of macro there. On the other hand, you might find a splendid toadfish at a cleaning station that is a world-class macro shot. Be prepared for any eventuality, and mount the tool that best fits the environment.
A Nikon shooter, with the 1.5 cropped sensor on a D2X or a D200, can actually cover most things on most reefs with only two lenses, a 12-24mm zoom and a 60mm Micro-Nikkor. Discretionary lenses would add something even wider, like the 10.5mm fisheye to expand coverage for shipwrecks and big pelagic life and a 105mm Micro-Nikkor to help capture the reef's minutiae. Canon has similar lenses for both cropped or full-frame sensors. A point-and-shoot digital may not have interchangeable lenses, but the native optics do an excellent job with fish portraits and even close-up photography. Some housing manufacturers (particularly Light & Motion, Ikelite, SeaLife, and Sea & Sea) recognize that these cameras need help for wide-angle and offer easy means to attach supplementary wide-angle adapters while underwater. To cover the diversity of life found on the coral reef, and to be ready to react to local conditions, make sure your camera housing is adaptable and you have the accessories necessary to cover the big three.
Avoid Gear Snafus
Be gear-redundant. For a digital SLR shooter, that means, at the very least, two of the same camera bodies and multiple strobes. Even the very best underwater camera housing can flood because of user error. Most housings are primarily mechanical, made of materials that don't corrode and can be rinsed with fresh water, dried and be ready to go again 30 minutes after even a calamitous flood. But cameras and lenses are quickly ruined by saltwater immersion. Having a second camera body allows you to shoot topside while the other camera is snuggled inside the housing and, more importantly, provides backup in case of mechanical failure.
Dropping and jostling your strobes while you're traveling is as hard on them as in-water use, probably more so. To that end, I usually take a minimum of three strobes with me on location, more for longer shoots. That provides dual strobe lighting and one spare when all goes well, and it would take the bad luck of two strobes going down to force me to shoot with a single strobe.
Another vulnerable component is the strobe cord. Delicate wires and pins can break or corrode in normal use. While it wasn't exactly normal use, during a recent session shooting over/unders of sharks off the back of a boat, I had three strobe cords chewed through by rowdy sharks. The need for spare strobe cords is a fact of life for the traveling underwater photographer.
Absorb The Dive Briefing
Except for those compact digitals with their supplementary lenses, you can't change lenses underwater. The single best source of information for what you'll be able to shoot on any dive is the briefing. If the briefing is all about pygmy seahorses and ghost pipefish, it might be a good dive to load the 100mm macro into the housing.
The divemaster giving the briefing may or may not know anything about underwater photography. You may have to ask questions to extract enough from his local knowledge to suit your needs. In order to choose the right lens to make the dive optimally productive, you may need to know visibility, current flow, bottom terrain and probable resident marine life. These guys dive these same reefs week after week, and they should be able to reasonably predict these variables. Still, there can and will be surprises once you get on the reef. You might wish you had a different lens, but by putting the probability in your favor by listening and asking the right questions, you'll no doubt have plenty of interesting subjects to photograph, despite the inevitable frustration of seeing the pygmy seahorse giving birth while diving with your 180-degree fisheye.
React When Conditions Are Favorable
Think about the shots that depend most on good conditions, and make those the No. 1 priority as conditions permit. If the sun is shining and the water is clear, even on the first day of the trip, try to get those important wide-angle shots that "tell the story." That sunshine or clear water may not stick around for the week. Macro shots and fish portraits can be captured under almost any light conditions, and even in marginal visibility, so, all things being equal, put off shooting the vignettes until a few of the establishing shots are in the can. The same goes for topside shots of the boat, resort or island. You can never predict what tomorrow might bring, so cover as much of the sunshine-dependent images as you can, when you can. Procrastinators will eventually get burned when wind or rain kicks in before the story-in-pictures is told.
Back Up Your Digital Files
One of the worst things that can happen on a photo trip is losing days of productive imaging due to a computer malfunction. The safest way manage digital images on location is to simultaneously download from the card to both a laptop computer and external hard drive by means of browsing software. I try to do a fairly aggressive edit daily from the files archived on the laptop so that at the end of the week the marginal images are already culled and the file is manageable and quick to review. But I like to have an unedited folder still residing on my portable hard drive, just in case of an overzealous delete key. The reality is that I normally dump the unedited shoot in favor of the edited version as soon as I get home, but it is nice to have the option to revisit everything from a particular setup should I have second thoughts about the coverage.
Photo Etiquette Revisited
I saw a recent forum post on wetpixel.com from Bill Vanant in response to an article on photo etiquette I wrote in the March issue of Scuba Diving:
Stephen Frink suggested that an underwater scene belonged to the photographer until he was done shooting. While that sounds nice, I am sure that there must be some limits. On a recent trip to Lembeh, my wife and I were diving with a group from Turkey, and these guys were unbelievable. You could see where they were from 100 feet away simply by looking for the cloud of dust where the three of them were shooting, looking like Custer's last stand. They would literally shoot at least 50 pictures each of some scorpionfish or frogfish or whatever. After shooting for 10 to 12 minutes, they would then turn around in a big cloud and swim off, leaving the poor fish blinded by flash and the water too murky for anyone else to shoot or video the scene. On a previous trip we dived with a couple, both photographers, and we worked out a deal: three pics each, then go to the back of the line for three more, repeating the process until you got one you liked and moved on. Given the relatively unlimited capacity now of digital cameras, where do you draw the line on how long to shoot a subject, particularly with a group that has four or five people trying to get something nice?
There are indeed limits, or should be anyway. Some animals can't stand repeated photographic intrusion, and it's wrong to compromise the well-being of a fish or critter for the sake of a photograph. In addition, photo-ops that are initiated by a guide who may be responsible for a small group of people is different from a photo-op created by one's own personal eye and happenstance.
I should have thought through all these permutations and the additional variable of the virtually limitless capacity the new eight-gigabyte cards bring to digital imaging. I still believe a photographer who finds a particular subject on his or her own should be allowed to properly cover the opportunity without distraction or interruption from another photographer trying to replicate the setup. But in a group scenario, especially where a critter-finder is tasked to point out subjects of interest to several divers at a time, common sense and polite behavior should trump "finders keepers." Take a few shots, leave the scene gently without creating a cloud of sand, and if the shot is important enough (and the subject robust enough), hang out in the vicinity so you can return and shoot it after the group has moved on.