Imaging Plus: Perfecting Exposures
Along with focus and composition, exposure is one of the most critical factors in creating a successful underwater photograph. Overexposure or underexposure can ruin what would have been a good image. Here are some proven tips to achieve beautiful and balanced exposures in your images:
Shoot in Raw
****Most recent cameras, even inexpensive compact cameras, include an option to capture images in a RAW format. Using this format is like having a “digital negative,” a file that cannot be overwritten or modified. It also contains more information than a compressed JPEG file. By using the RAW format, you can interpret the camera’s data, including exposure, using postproduction software such as Adobe Photoshop Lightroom. Today’s camera sensors capture an amazing amount of dynamic range, including additional “head room” — highlight data that can be recovered, but only if the image was shot in a RAW format.
Set Yourself up for Success
Getting correct exposure in-camera is critical, because correcting an image that is either too light or too dark after the fact poses problems in the final image quality. Underexposing an image and then brightening it in postproduction can introduce noise and artifacts into the shadow areas within an image, which are difficult or impossible to correct. Overexposure can potentially create even more serious issues; if bright areas in the image get clipped (washed out), they might not be recoverable.
Balance the Ambient and Artificial Lighting
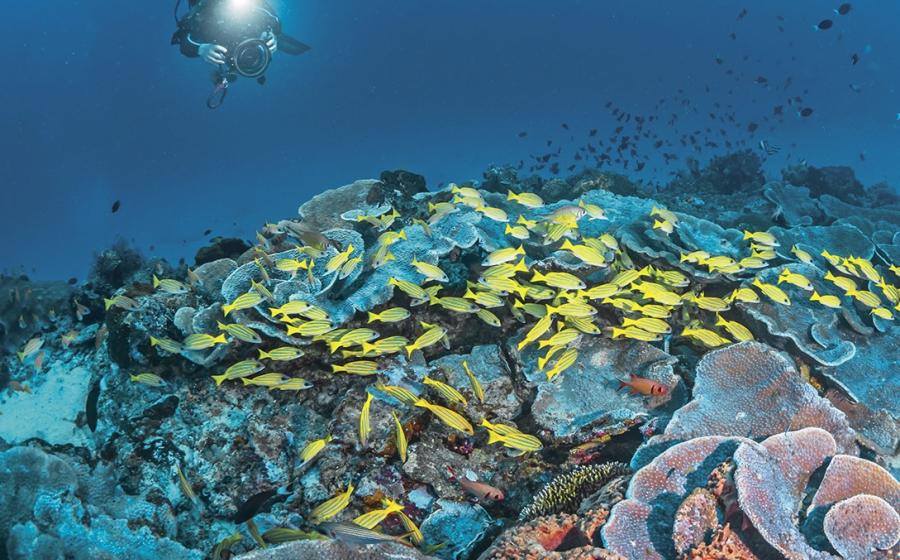
One of the most important aspects of using strobes in wide-angle photography is to make the subject look as if it hasn’t been lit with strobes at all. If a layperson looks at your image by strobes and thinks it is entirely lit by natural light, you’ve succeeded. The key is to build your exposure using manual camera and strobe settings. Start by getting your background and ambient lighting dialed in. You don’t want the water exposed too bright or too dark. Next, dial in your strobes to properly light your foreground subject. Ideally the two exposures — the ambient and the artificial — should blend as closely as possible.
Putting Your Histogram to Work
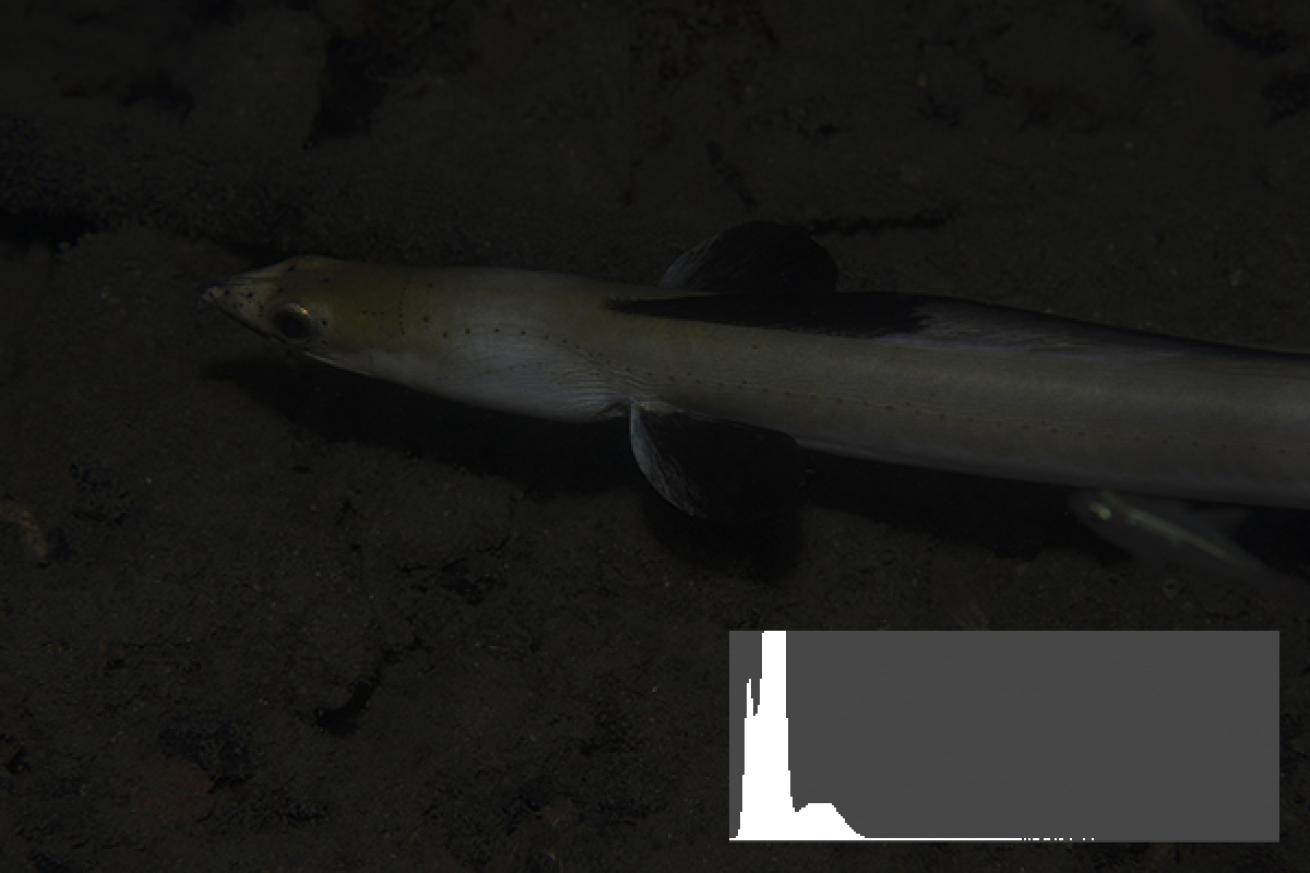
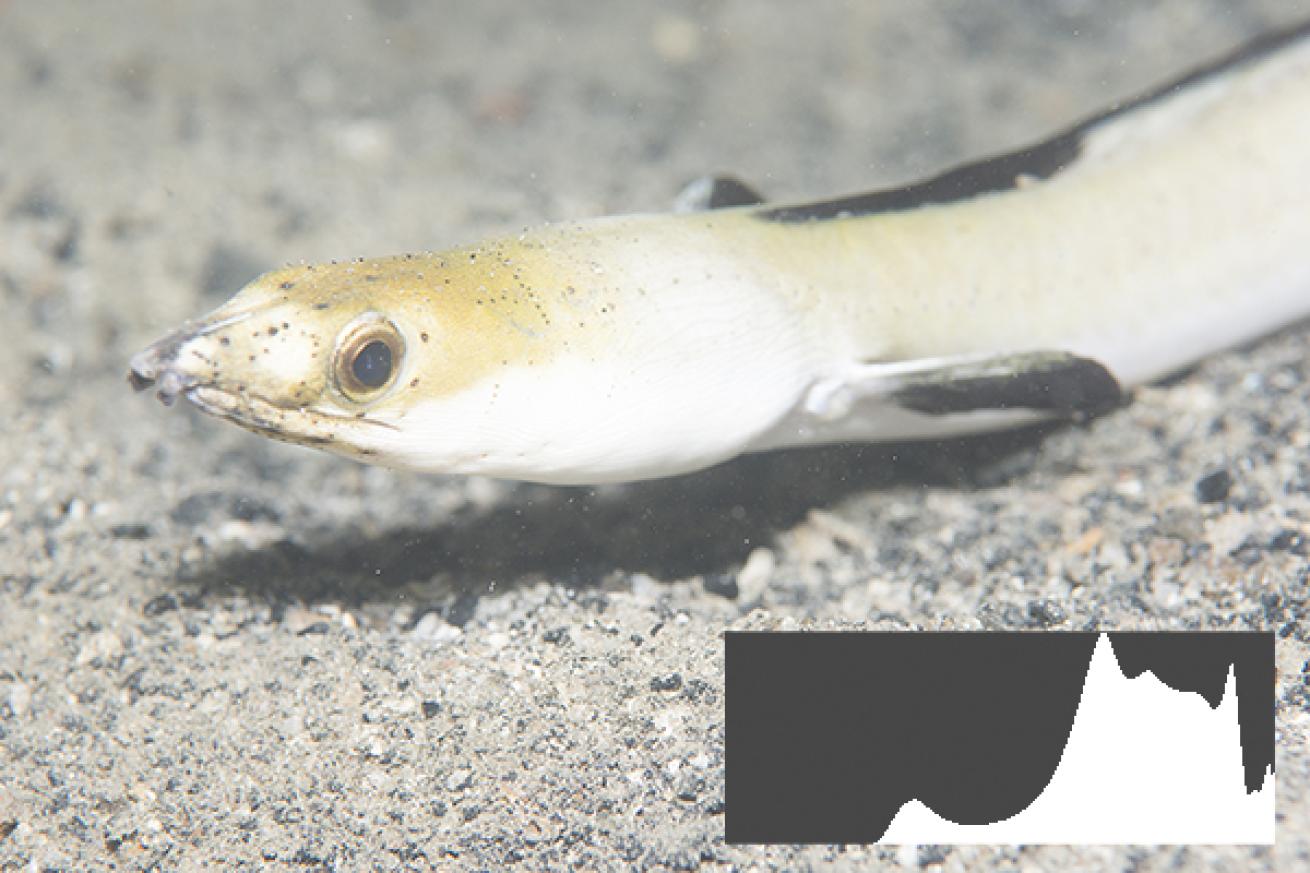
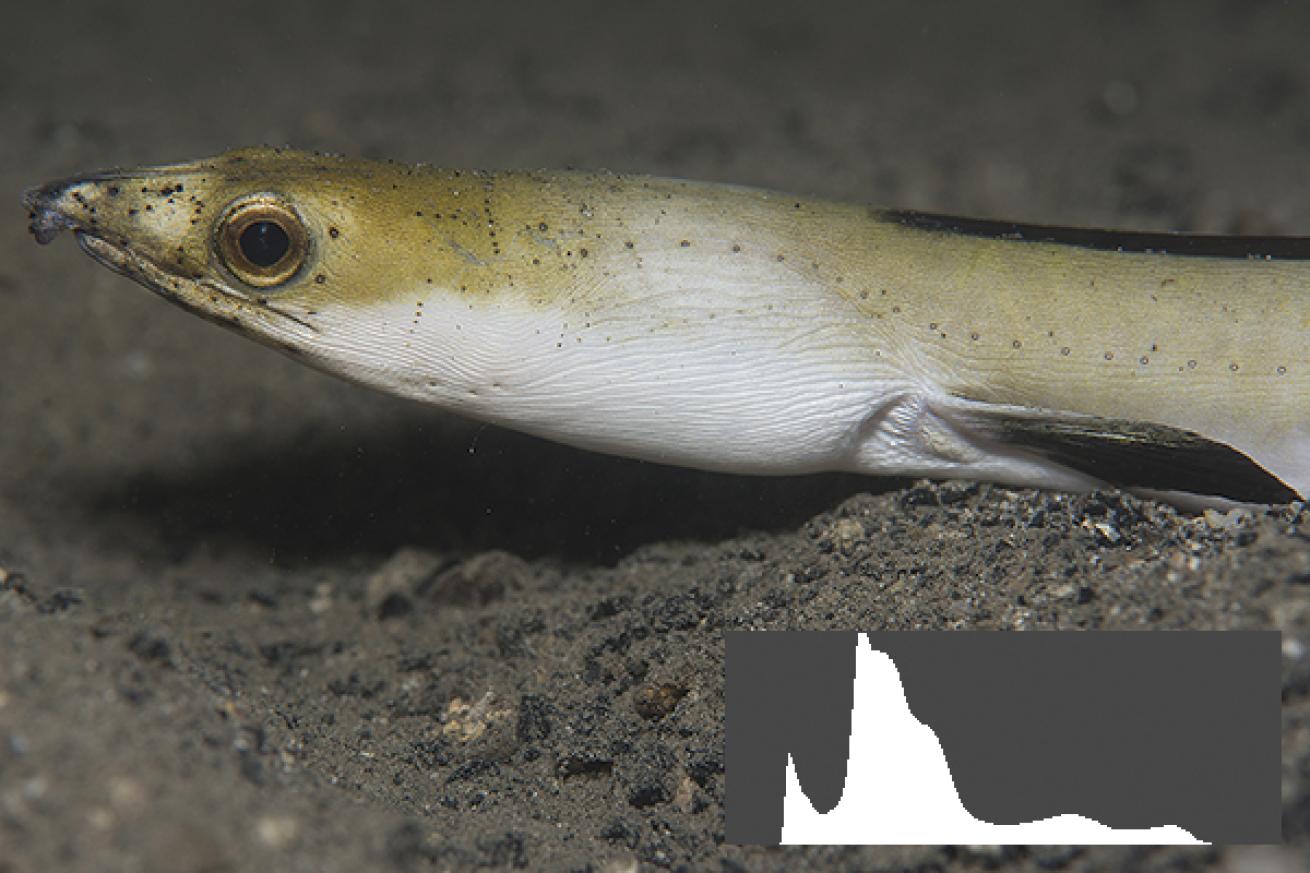
When working in bright light or near the surface, judging the image on your LCD screen can be a challenge. What looked great underwater now looks way too dark when you’re home viewing it on your computer screen. One of the shooter’s essential tools for judging exposure in the field is the histogram, which can be displayed as an overlay during playback on most cameras. The histogram shows a graph of the pixels from dark to light within your image. While there is no one correct histogram, a spike at either the left or right edges shows a problem with underexposure or overexposure. Many cameras also offer a red/green/blue histogram, indicating if there is an issue with one particular color channel. When shooting underwater, it’s often useful to have the histogram view as the default playback option to make snap judgments on exposure.

Sterling Zumbrunn
Shooting into the sun takes careful exposure calculation to be sure details are not completely washed out. Shooting in a RAW format is essential for recovering highlight detail.
Sterling Zumbrunn
One of the shooter’s essential tools for judging exposure in the field is the histogram, which can be displayed as an overlay during playback on most cameras.
Sterling Zumbrunn
While there is no one correct histogram, a spike at either the left or right edges shows a problem with underexposure or overexposure.
Sterling Zumbrunn
Many cameras also offer a red/green/blue histogram, indicating if there is an issue with one particular color channel. When shooting underwater, it’s often useful to have the histogram view as the default playback option to make snap judgments on exposure.
Along with focus and composition, exposure is one of the most critical factors in creating a successful underwater photograph. Overexposure or underexposure can ruin what would have been a good image. Here are some proven tips to achieve beautiful and balanced exposures in your images:
Shoot in Raw
****Most recent cameras, even inexpensive compact cameras, include an option to capture images in a RAW format. Using this format is like having a “digital negative,” a file that cannot be overwritten or modified. It also contains more information than a compressed JPEG file. By using the RAW format, you can interpret the camera’s data, including exposure, using postproduction software such as Adobe Photoshop Lightroom. Today’s camera sensors capture an amazing amount of dynamic range, including additional “head room” — highlight data that can be recovered, but only if the image was shot in a RAW format.
Set Yourself up for Success
Getting correct exposure in-camera is critical, because correcting an image that is either too light or too dark after the fact poses problems in the final image quality. Underexposing an image and then brightening it in postproduction can introduce noise and artifacts into the shadow areas within an image, which are difficult or impossible to correct. Overexposure can potentially create even more serious issues; if bright areas in the image get clipped (washed out), they might not be recoverable.
Balance the Ambient and Artificial Lighting
One of the most important aspects of using strobes in wide-angle photography is to make the subject look as if it hasn’t been lit with strobes at all. If a layperson looks at your image by strobes and thinks it is entirely lit by natural light, you’ve succeeded. The key is to build your exposure using manual camera and strobe settings. Start by getting your background and ambient lighting dialed in. You don’t want the water exposed too bright or too dark. Next, dial in your strobes to properly light your foreground subject. Ideally the two exposures — the ambient and the artificial — should blend as closely as possible.
Putting Your Histogram to Work
When working in bright light or near the surface, judging the image on your LCD screen can be a challenge. What looked great underwater now looks way too dark when you’re home viewing it on your computer screen. One of the shooter’s essential tools for judging exposure in the field is the histogram, which can be displayed as an overlay during playback on most cameras. The histogram shows a graph of the pixels from dark to light within your image. While there is no one correct histogram, a spike at either the left or right edges shows a problem with underexposure or overexposure. Many cameras also offer a red/green/blue histogram, indicating if there is an issue with one particular color channel. When shooting underwater, it’s often useful to have the histogram view as the default playback option to make snap judgments on exposure.

