Point-and-Shoot Perfection

June 2007
Text and Photography by Stephen Frink
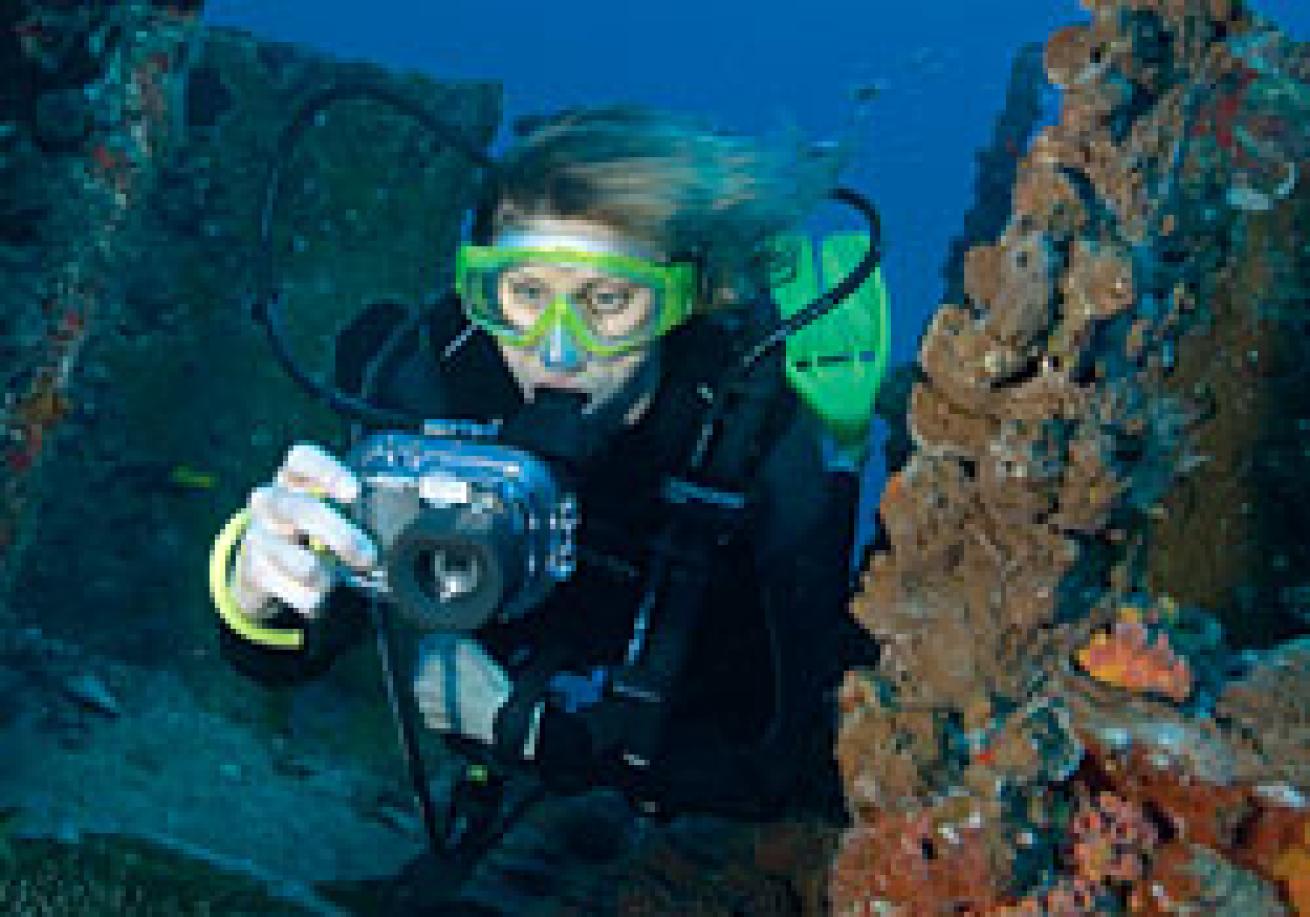
Taking a point-and-shoot camera underwater and happily clicking away is not difficult--thousands of divers do it every day. But I wanted more. I wanted photos with good color and minimal backscatter. For that, I had to figure out a way to make an external flash work on a housing that didn't provide an easy way to use one.
As a Christmas present to my daughter, I purchased a nice compact camera with minimal digital lag and high resolution, the Sony DCS-N2, a 10.1-megapixel wonder with a very cool rear touchscreen and lots of features. It wasn't long before she wanted to use it underwater, and I began to think about how we might rig it for underwater use. I think that's probably how a lot of underwater photo hobbyists get into it--they have a digital camera they bought for topside use and decide they'd like to use it underwater as well.
If I had been looking for a dedicated underwater compact digital, I would have considered the new SeaLife DC600 or any one of several models of Sea & Sea camera/housing combos. The advantage to these systems is that the housings are made specifically for a particular camera, and they have controls that facilitate navigation for the kinds of tasks underwater shooters face. They also have nice, ergonomic ways to mount a fiber optic to trigger their own accessory external flashes. No muss, no fuss, and very nice results. Because underwater photography was only an afterthought in this case, I hadn't really considered these systems.
In shopping for a housing for the camera, I first turned to Ikelite, which offers more housing options for more cameras, both compact digital and digital SLR, than anyone else. However, Ikelite didn't have an N2 housing yet. For a street price of around $150, I bought a nicely designed and compact Sony housing depth-rated to 132 feet.
Then came the tough part: Getting an underwater strobe unit to work with this housing. There is no bulkhead fitting on the Sony housing to hardwire an external strobe. As is the case with many of the dedicated digital camera housings from Canon, Nikon, Olympus and others, the only way to trigger an external flash is by reading the internal flash on the camera via some kind of slave or fiber optic.
Why is an external strobe so important? I knew from my first experiences as an underwater photographer that:
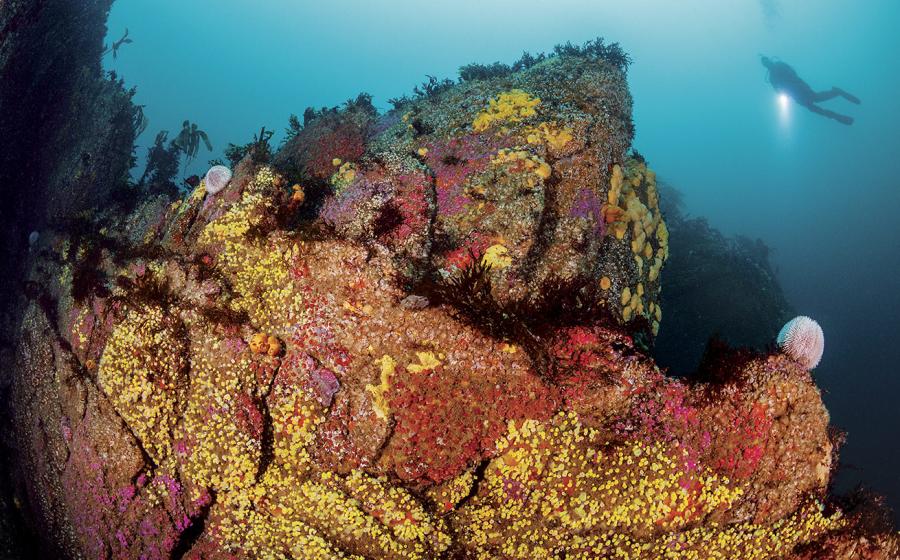
- Capturing good color underwater requires artificial light.
- Having a strobe too close to the lens will create backscatter.
- It takes a fairly powerful strobe to punch through the cyan filter that is seawater to reveal color in a subject two feet or more away.
I'd used enough point-and-shoot cameras to realize that under ideal conditions--in clear water and working very close to the subject--the camera's internal strobe can capture a nice image. However, the success rate when shooting like this is quite low. The strobes are not very powerful, and the automatic systems that make them spectacular tools above water are often useless below. I wanted more versatility and capability. My challenge: Find a way to rig an external strobe to work reliably on a housed compact digital camera.
Point-and-Shoot Strobe Synch 101
Most compact digital cameras use both "preflash" and "real flash." The preflash controls strobe output for accurate exposure. The camera emits a series of small bursts of light that bounce back from the subject and help the camera determine how much of the total strobe power to emit for the final exposure. This happens instantaneously, and many external flashes lack the ability to distinguish between preflash and real flash. So, they trigger at the preflash and aren't recycled in time for the real flash. Complicating matters further, preflash protocol varies from camera to camera.
To trigger an external strobe in synch with a preflash-enabled camera requires fairly sophisticated reverse engineering in a submersible strobe.
Ikelite offers digital SubStrobes that can provide a preflash and resultant TTL flash when used in conjunction with special circuitry on many of its housings. However, this requires Ikelite's circuitry and can't be fit into most other housings. Other digital strobe options with housings from Sony, Canon, Nikon, etc. can trigger in synch with the main flash, but will not be TTL.
The best of these submersible strobes provide some way to adjust the strobe power easily, preferably by a dial on the back of the strobe head. This means that exposure adjustment is done after the fact, by looking at the camera's LCD screen and increasing or decreasing power as necessary for subsequent shots. Fortunately, it takes very little practice to get good at predicting how much strobe power is necessary, thanks to the immediate review that today's digital cameras make possible.
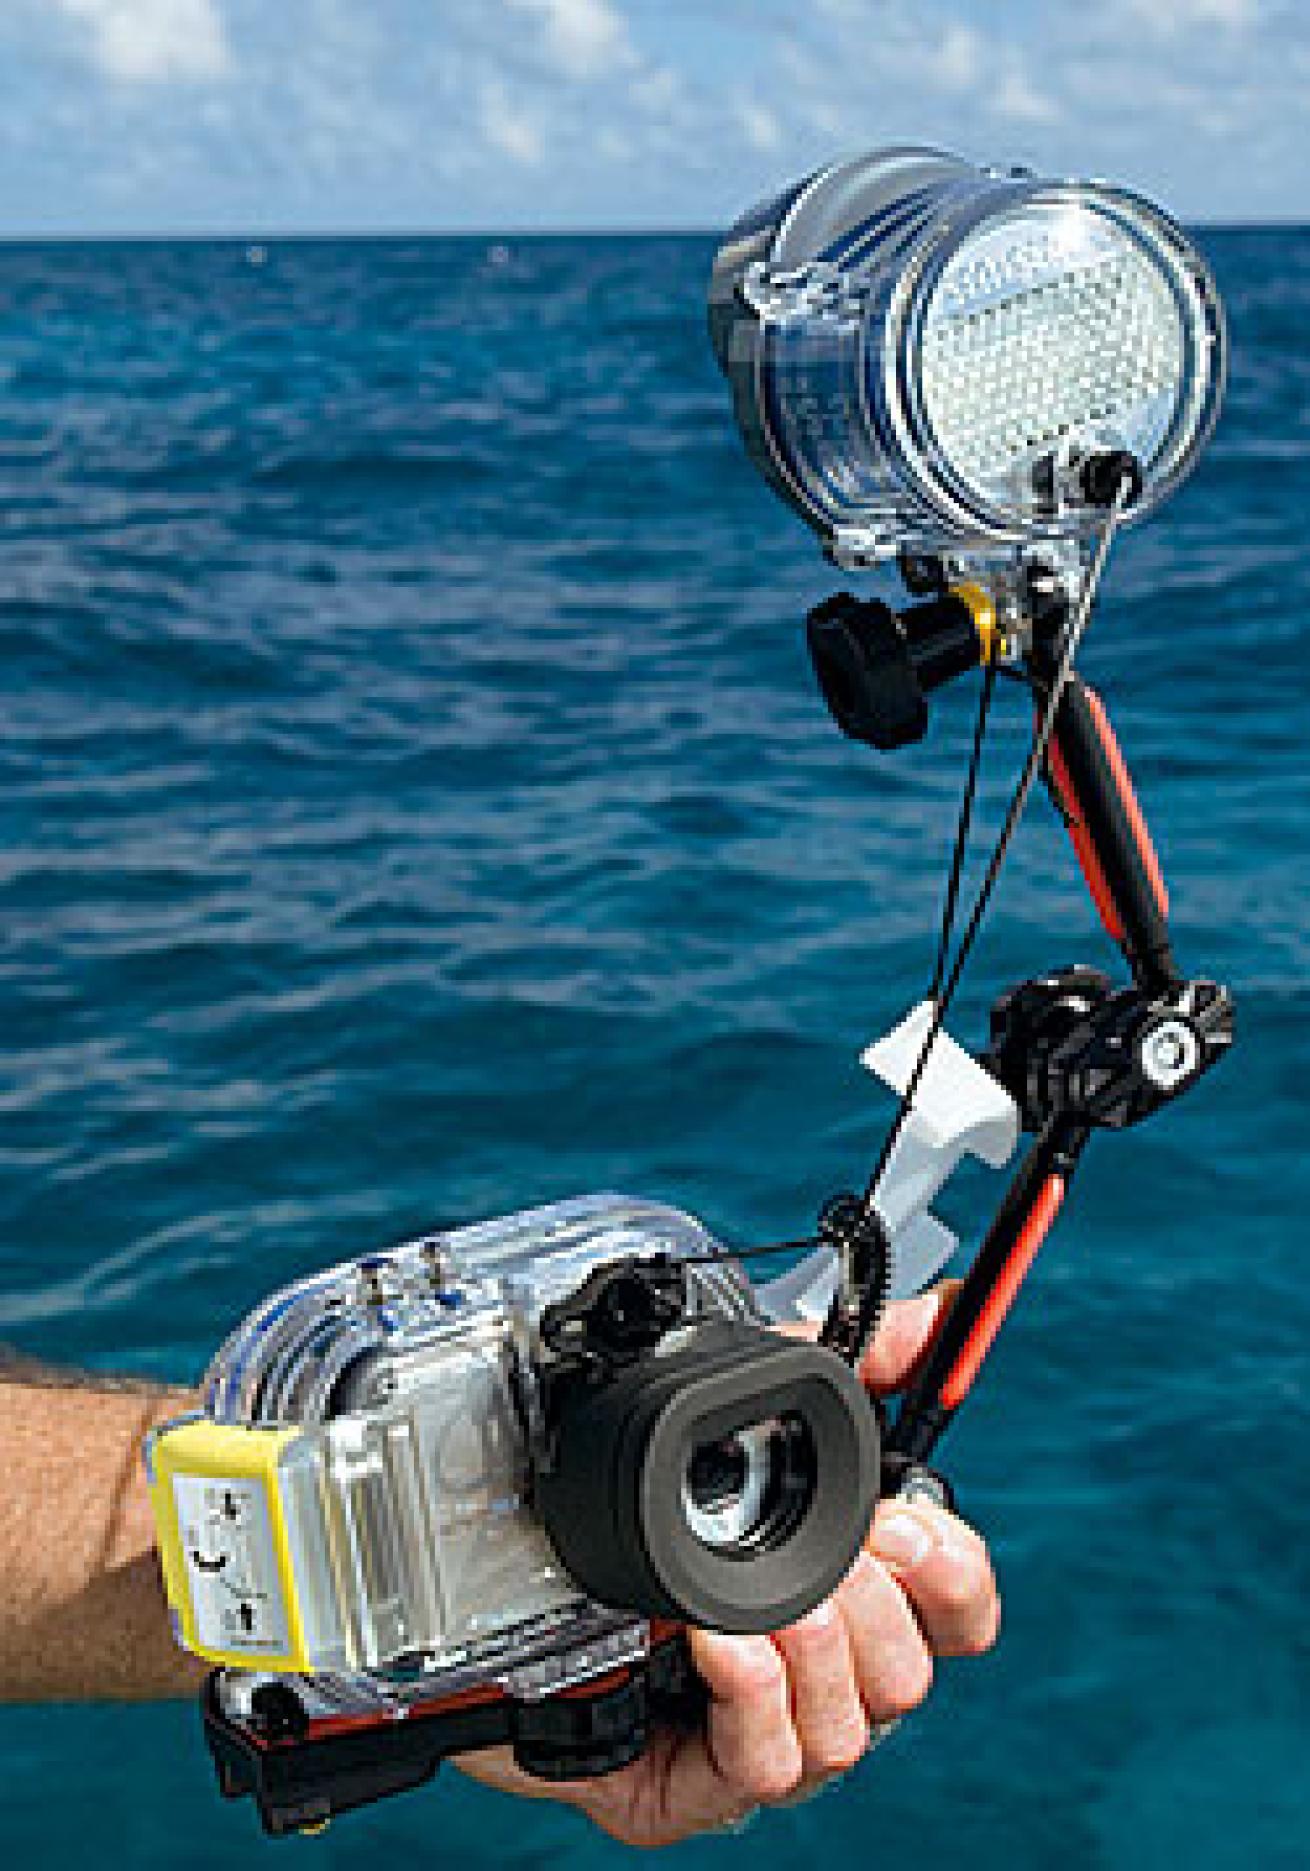
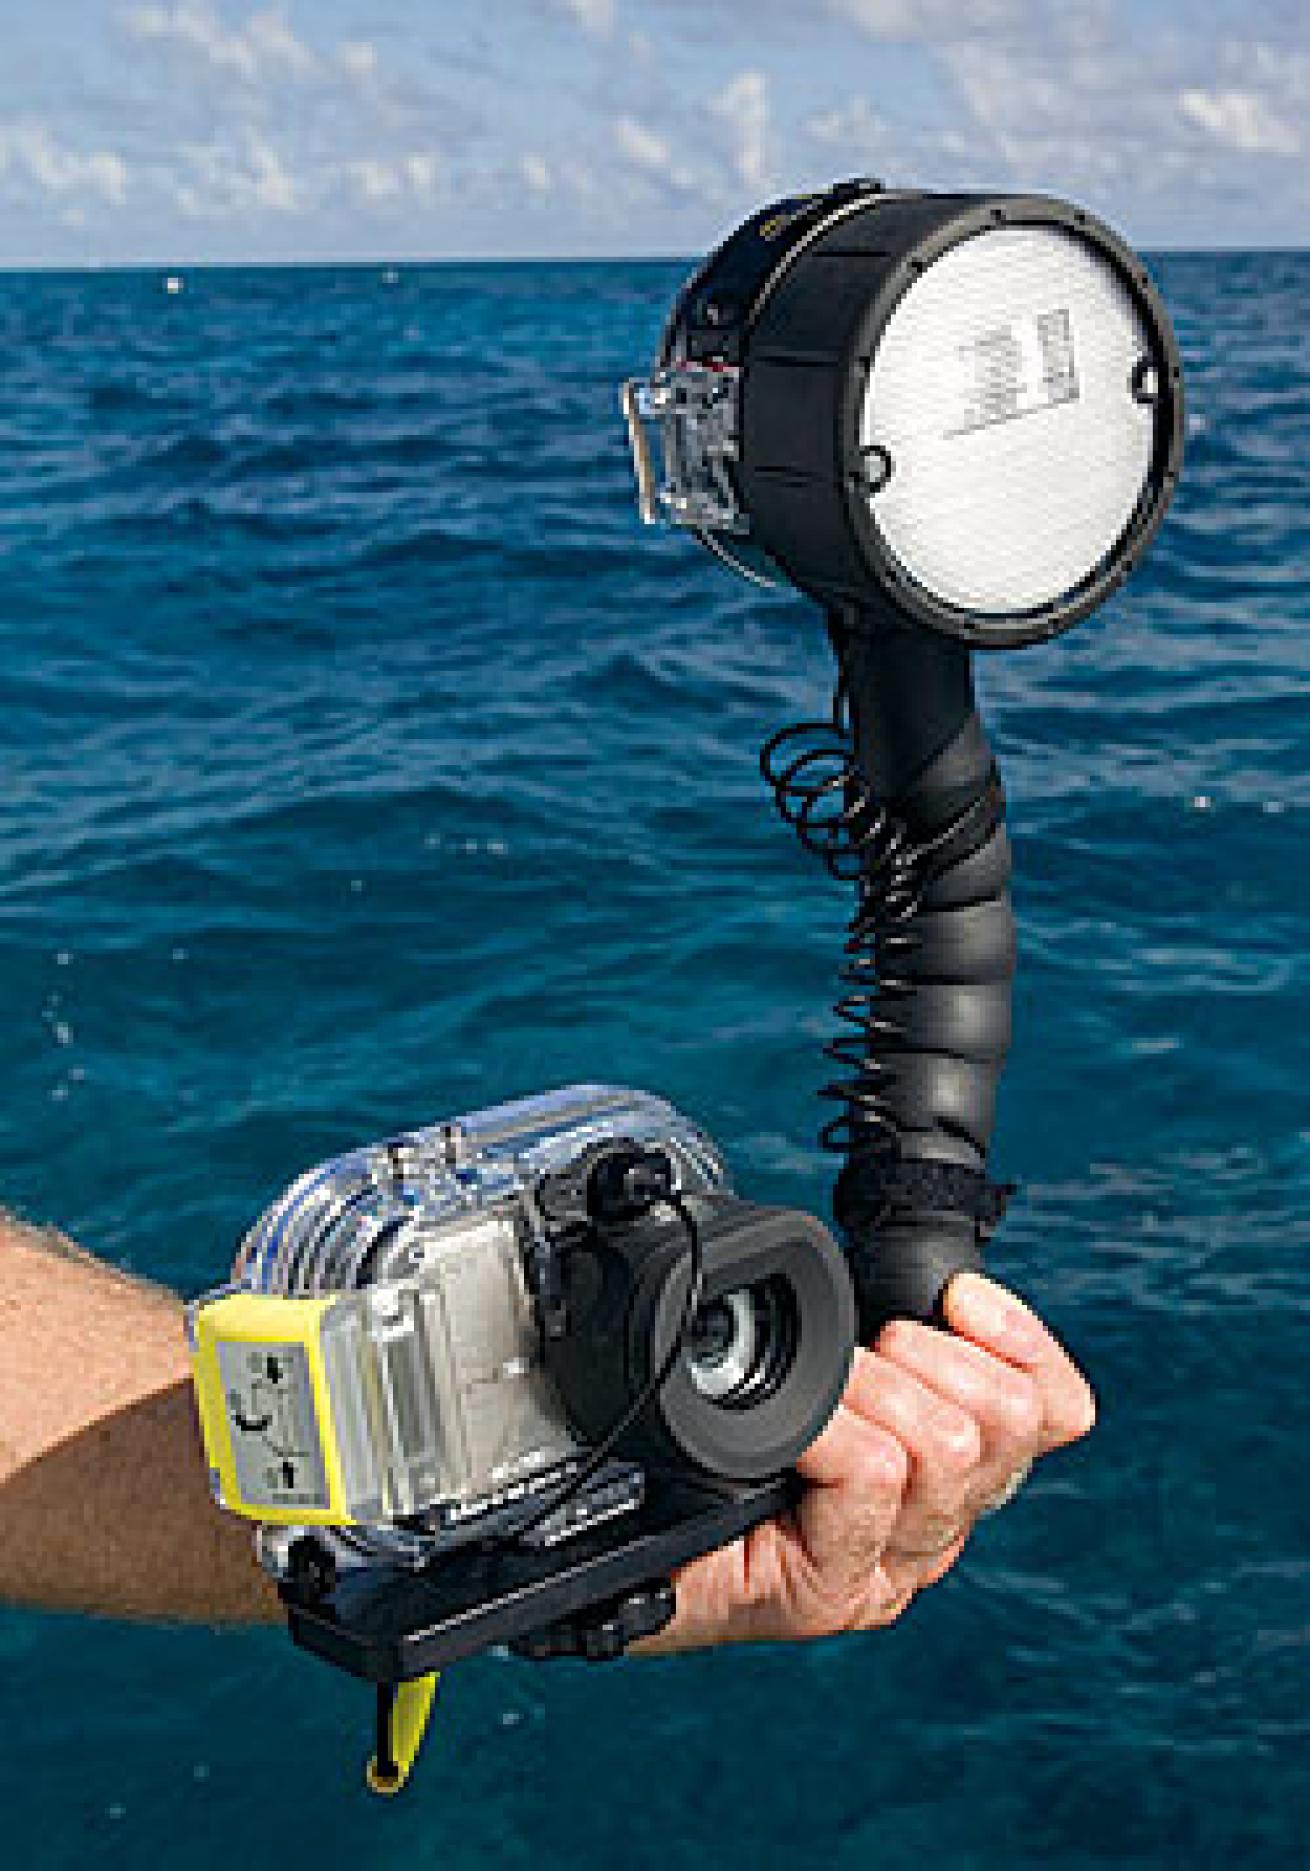
I tried three separate systems to make an external flash work with this camera and housing: the SeaLife Digital Flash, the Sea & Sea YS-27DX and Ikelite DS51 strobe with manual controller. The Ikelite slave sensor reads the light from the camera's built-in flash via an external sensor hard-wired into the strobe. Because the sensor is positioned so near the camera, and because its sensitivity is so great, this trigger method proved quite accurate. This is in contrast to slave sensors built into an underwater strobe that may be a foot or more away. A combination of high ambient light (making the strobe from the camera hard to detect) and the requirement that the camera's strobe has to bounce off the subject and then back through the water column to the sensor in order to trigger the external slave strobe makes them famously unreliable. The downside of the Ikelite system is that the camera's strobe is so near the lens that it still creates backscatter, while at the same time triggering the DS51. Ikelite provides deflectors on some of their tray systems to block the in-camera flash from illuminating particles and to more efficiently bounce the light to the manual controller.
For both the SeaLife and Sea & Sea strobes, I bought a clever little lighting accessory from SeaLife known as the SeaLife FlashLink. Actually, the only parts I needed in this kit were the clear self-adhesive Velcro disk that sticks onto the flat surface of any Plexiglas housing and the black holster that affixes the fiber optic. There is an Allen setscrew to hold the fiber optic perpendicular to the strobe, especially important because fiber optics work best when the light is shot "down the pipe" rather than from the side as happens with some attachment systems. Unfortunately, the adhesive is not adequate for the black sensor side, and I had to use a marine silicone to attach it reliably. Allow 24 hours for the silicone to cure properly.
The In-Water Experience
All three strobes have very simple dials to increase or decrease the light as necessary. The DS51 has multiple power settings on the strobe, but I found it easier to use the rheostat on the manual controller, as it was much closer to my hand and more variable. The Sea & Sea has a very nice ball-joint arm and tray system, making it easy to articulate the strobe. Ikelite also uses a ball-joint system, and SeaLife has a foam-covered multi-segment arm that also allows easy strobe head positioning. All three strobes allow the addition of diffusers to widen and soften the light, and each easily synchronized with the preflash of the Sony N2 camera. Once I figured out how to affix the fiber optic to the Sony housing, each system was very light and easy to use in the water. Plus, any of these systems would fit into a small attache-size carrying case. What a pleasure for travel compared to the massive cases I use for my digital SLR system now!
Best Settings for Pointing and Shooting
Don't use the "auto ISO" setting. While it may be handy topside, auto ISO will change the light sensitivity according to ambient light conditions. Underwater, conditions can be changed by depth, ledges and caves, or even a cloud passing overhead. A strobe power setting that worked at ISO 100 and three feet away will significantly overexpose when the camera kicks up to ISO 800, just because ambient light decreased.
Use the "cloudy day" white balance setting. Most compact cameras capture images as JPG rather than RAW files, making it prudent to get exposure and color balance as close to right as possible at the moment of exposure. The cloudy day setting is probably the best white balance option to counteract the predominantly blue bias of the underwater scene.
Use manual settings. While the total automation of most compact cameras is a comfort for topside use, choosing a basic shutter speed setting like 1/60th or 1/125th of a second, and then varying the aperture as needed is most efficient for underwater use. In reality, most of the exposure changes will come from the strobe's power dial, but the right "ballpark" shutter speed and aperture combination will make the background more pleasing.
Get close. While this axiom applies to all underwater imaging, with the relatively minimal power of most strobes for compact camera application, it is even more critical.
Know how to navigate. The menus of many cameras are fairly complex, but take comfort in knowing that relatively few pathways are important for underwater use. But those that are have to be used often and quickly. So learn what buttons have to be pressed to do what. And if you can't read the menus, invest in an optically corrected mask or, at the very least, gauge readers.
Know how to engage the camera's macro function. Usually marked by a flower symbol, the macro mode will open up a whole new range of underwater subjects. But when you're working that close, be sure to turn the strobe's power setting way down. In fact, even the lowest setting may overexpose, in which case the addition of the strobe diffuser will probably work better.
Make sure your housing can engage the camera's most important controls. This point is the one I probably should have considered first. Many of the Sony N2 functions are set via the touchscreen, and the Sony housing does not have buttons to press the screen in these navigable areas. However, setting the ISO at 100, setting the shutter speed at 1/60th of a second and the aperture at f-8 in advance seemed to serve me quite well. Simply changing the power setting on the strobe according to the distance and subject reflectance ensured consistently good exposures.
Keep fresh batteries in your strobe. Because this style of photography depends so heavily on the external flash, your images will suffer if the strobe is not operating efficiently because of exhausted batteries. I've been there and, regrettably, done that.
June 2007
Text and Photography by Stephen Frink
Taking a point-and-shoot camera underwater and happily clicking away is not difficult--thousands of divers do it every day. But I wanted more. I wanted photos with good color and minimal backscatter. For that, I had to figure out a way to make an external flash work on a housing that didn't provide an easy way to use one.
As a Christmas present to my daughter, I purchased a nice compact camera with minimal digital lag and high resolution, the Sony DCS-N2, a 10.1-megapixel wonder with a very cool rear touchscreen and lots of features. It wasn't long before she wanted to use it underwater, and I began to think about how we might rig it for underwater use. I think that's probably how a lot of underwater photo hobbyists get into it--they have a digital camera they bought for topside use and decide they'd like to use it underwater as well.
If I had been looking for a dedicated underwater compact digital, I would have considered the new SeaLife DC600 or any one of several models of Sea & Sea camera/housing combos. The advantage to these systems is that the housings are made specifically for a particular camera, and they have controls that facilitate navigation for the kinds of tasks underwater shooters face. They also have nice, ergonomic ways to mount a fiber optic to trigger their own accessory external flashes. No muss, no fuss, and very nice results. Because underwater photography was only an afterthought in this case, I hadn't really considered these systems.
In shopping for a housing for the camera, I first turned to Ikelite, which offers more housing options for more cameras, both compact digital and digital SLR, than anyone else. However, Ikelite didn't have an N2 housing yet. For a street price of around $150, I bought a nicely designed and compact Sony housing depth-rated to 132 feet.
Then came the tough part: Getting an underwater strobe unit to work with this housing. There is no bulkhead fitting on the Sony housing to hardwire an external strobe. As is the case with many of the dedicated digital camera housings from Canon, Nikon, Olympus and others, the only way to trigger an external flash is by reading the internal flash on the camera via some kind of slave or fiber optic.
Why is an external strobe so important? I knew from my first experiences as an underwater photographer that:
- Capturing good color underwater requires artificial light.
- Having a strobe too close to the lens will create backscatter.
- It takes a fairly powerful strobe to punch through the cyan filter that is seawater to reveal color in a subject two feet or more away. I'd used enough point-and-shoot cameras to realize that under ideal conditions--in clear water and working very close to the subject--the camera's internal strobe can capture a nice image. However, the success rate when shooting like this is quite low. The strobes are not very powerful, and the automatic systems that make them spectacular tools above water are often useless below. I wanted more versatility and capability. My challenge: Find a way to rig an external strobe to work reliably on a housed compact digital camera.
Point-and-Shoot Strobe Synch 101
Most compact digital cameras use both "preflash" and "real flash." The preflash controls strobe output for accurate exposure. The camera emits a series of small bursts of light that bounce back from the subject and help the camera determine how much of the total strobe power to emit for the final exposure. This happens instantaneously, and many external flashes lack the ability to distinguish between preflash and real flash. So, they trigger at the preflash and aren't recycled in time for the real flash. Complicating matters further, preflash protocol varies from camera to camera.
To trigger an external strobe in synch with a preflash-enabled camera requires fairly sophisticated reverse engineering in a submersible strobe.
Ikelite offers digital SubStrobes that can provide a preflash and resultant TTL flash when used in conjunction with special circuitry on many of its housings. However, this requires Ikelite's circuitry and can't be fit into most other housings. Other digital strobe options with housings from Sony, Canon, Nikon, etc. can trigger in synch with the main flash, but will not be TTL.
The best of these submersible strobes provide some way to adjust the strobe power easily, preferably by a dial on the back of the strobe head. This means that exposure adjustment is done after the fact, by looking at the camera's LCD screen and increasing or decreasing power as necessary for subsequent shots. Fortunately, it takes very little practice to get good at predicting how much strobe power is necessary, thanks to the immediate review that today's digital cameras make possible.
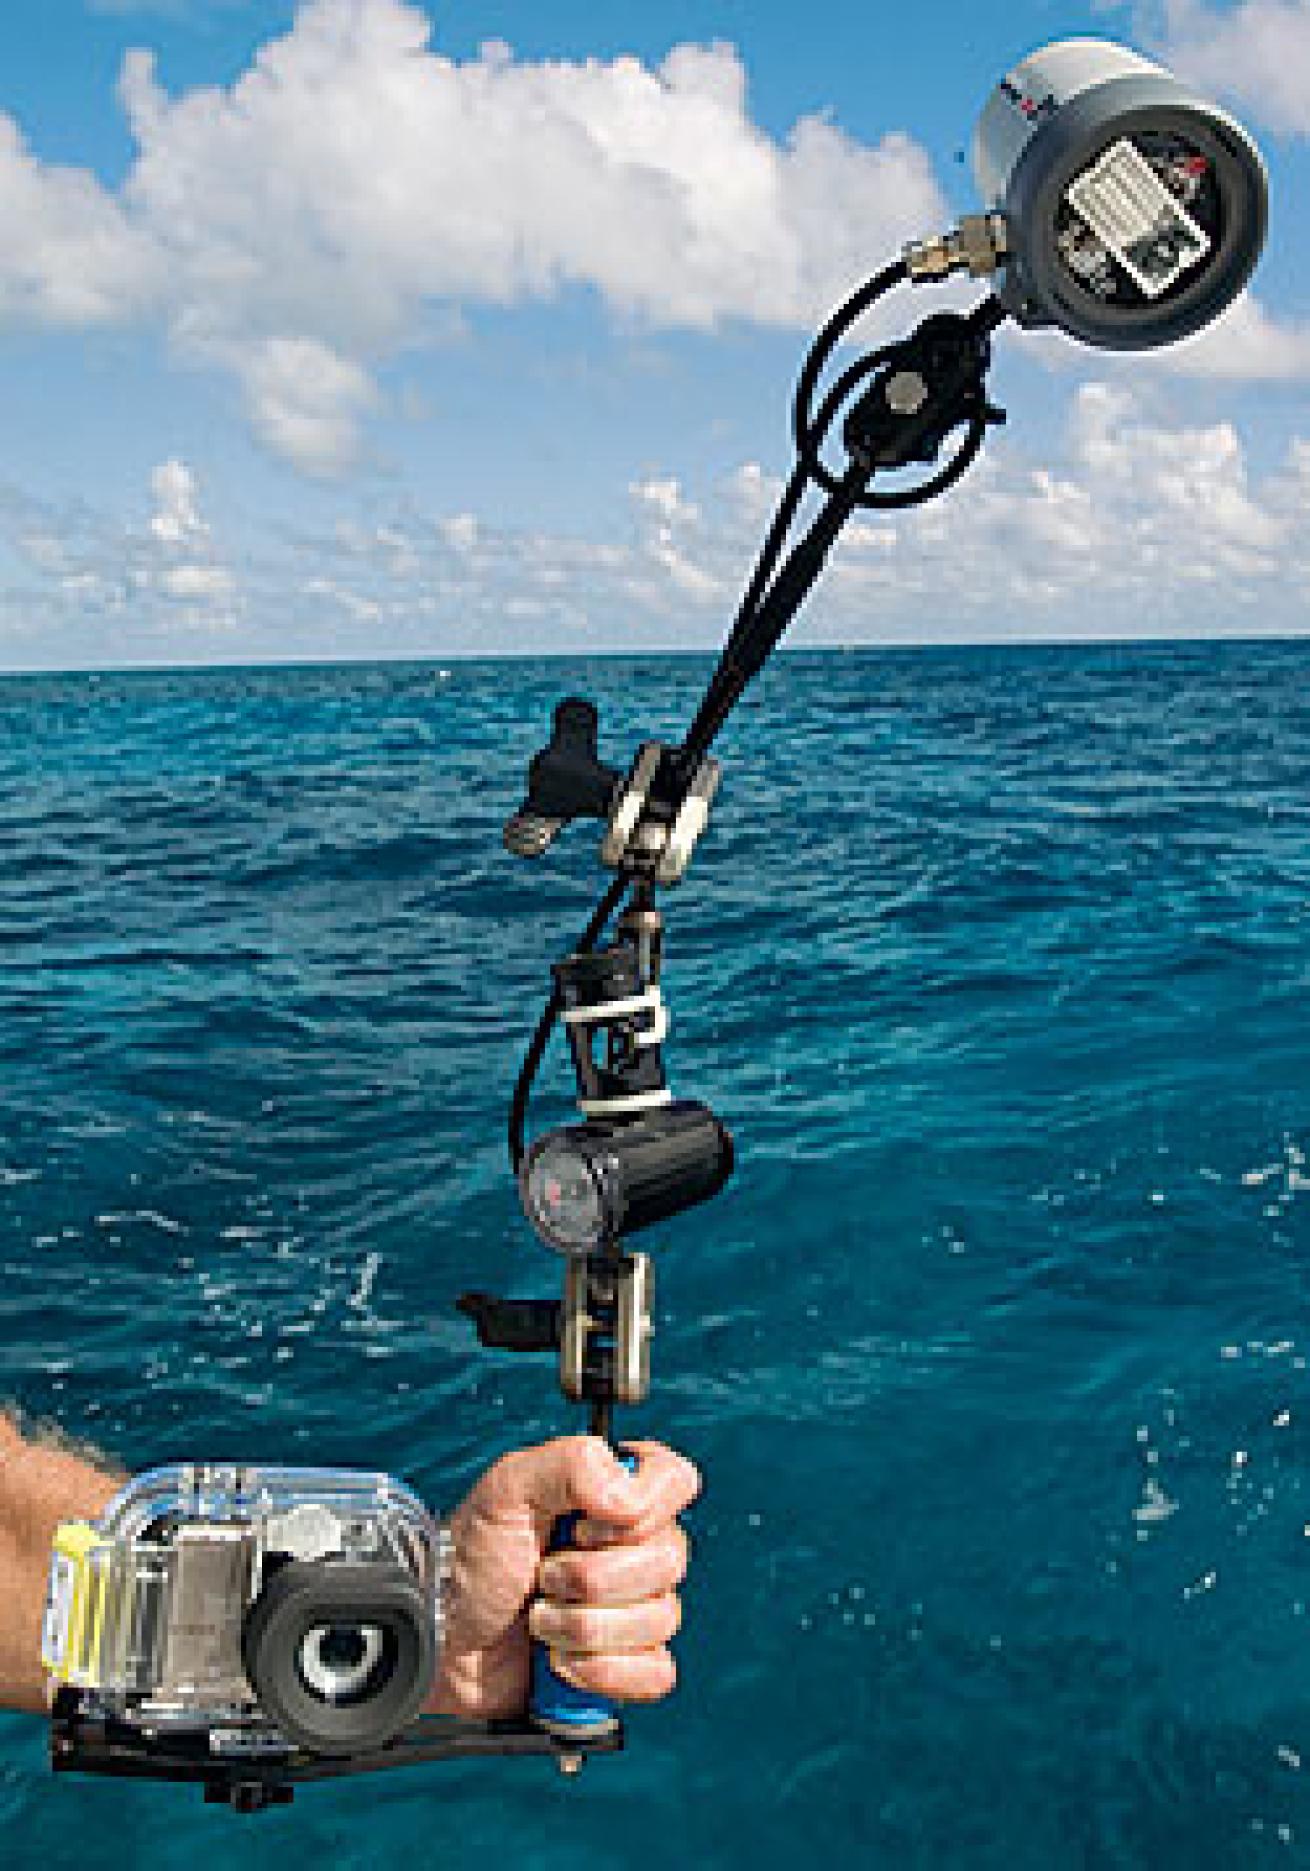
I tried three separate systems to make an external flash work with this camera and housing: the SeaLife Digital Flash, the Sea & Sea YS-27DX and Ikelite DS51 strobe with manual controller. The Ikelite slave sensor reads the light from the camera's built-in flash via an external sensor hard-wired into the strobe. Because the sensor is positioned so near the camera, and because its sensitivity is so great, this trigger method proved quite accurate. This is in contrast to slave sensors built into an underwater strobe that may be a foot or more away. A combination of high ambient light (making the strobe from the camera hard to detect) and the requirement that the camera's strobe has to bounce off the subject and then back through the water column to the sensor in order to trigger the external slave strobe makes them famously unreliable. The downside of the Ikelite system is that the camera's strobe is so near the lens that it still creates backscatter, while at the same time triggering the DS51. Ikelite provides deflectors on some of their tray systems to block the in-camera flash from illuminating particles and to more efficiently bounce the light to the manual controller.
For both the SeaLife and Sea & Sea strobes, I bought a clever little lighting accessory from SeaLife known as the SeaLife FlashLink. Actually, the only parts I needed in this kit were the clear self-adhesive Velcro disk that sticks onto the flat surface of any Plexiglas housing and the black holster that affixes the fiber optic. There is an Allen setscrew to hold the fiber optic perpendicular to the strobe, especially important because fiber optics work best when the light is shot "down the pipe" rather than from the side as happens with some attachment systems. Unfortunately, the adhesive is not adequate for the black sensor side, and I had to use a marine silicone to attach it reliably. Allow 24 hours for the silicone to cure properly.
The In-Water Experience
All three strobes have very simple dials to increase or decrease the light as necessary. The DS51 has multiple power settings on the strobe, but I found it easier to use the rheostat on the manual controller, as it was much closer to my hand and more variable. The Sea & Sea has a very nice ball-joint arm and tray system, making it easy to articulate the strobe. Ikelite also uses a ball-joint system, and SeaLife has a foam-covered multi-segment arm that also allows easy strobe head positioning. All three strobes allow the addition of diffusers to widen and soften the light, and each easily synchronized with the preflash of the Sony N2 camera. Once I figured out how to affix the fiber optic to the Sony housing, each system was very light and easy to use in the water. Plus, any of these systems would fit into a small attache-size carrying case. What a pleasure for travel compared to the massive cases I use for my digital SLR system now!
Best Settings for Pointing and Shooting
Don't use the "auto ISO" setting. While it may be handy topside, auto ISO will change the light sensitivity according to ambient light conditions. Underwater, conditions can be changed by depth, ledges and caves, or even a cloud passing overhead. A strobe power setting that worked at ISO 100 and three feet away will significantly overexpose when the camera kicks up to ISO 800, just because ambient light decreased.
Use the "cloudy day" white balance setting. Most compact cameras capture images as JPG rather than RAW files, making it prudent to get exposure and color balance as close to right as possible at the moment of exposure. The cloudy day setting is probably the best white balance option to counteract the predominantly blue bias of the underwater scene.
Use manual settings. While the total automation of most compact cameras is a comfort for topside use, choosing a basic shutter speed setting like 1/60th or 1/125th of a second, and then varying the aperture as needed is most efficient for underwater use. In reality, most of the exposure changes will come from the strobe's power dial, but the right "ballpark" shutter speed and aperture combination will make the background more pleasing.
Get close. While this axiom applies to all underwater imaging, with the relatively minimal power of most strobes for compact camera application, it is even more critical.
Know how to navigate. The menus of many cameras are fairly complex, but take comfort in knowing that relatively few pathways are important for underwater use. But those that are have to be used often and quickly. So learn what buttons have to be pressed to do what. And if you can't read the menus, invest in an optically corrected mask or, at the very least, gauge readers.
Know how to engage the camera's macro function. Usually marked by a flower symbol, the macro mode will open up a whole new range of underwater subjects. But when you're working that close, be sure to turn the strobe's power setting way down. In fact, even the lowest setting may overexpose, in which case the addition of the strobe diffuser will probably work better.
Make sure your housing can engage the camera's most important controls. This point is the one I probably should have considered first. Many of the Sony N2 functions are set via the touchscreen, and the Sony housing does not have buttons to press the screen in these navigable areas. However, setting the ISO at 100, setting the shutter speed at 1/60th of a second and the aperture at f-8 in advance seemed to serve me quite well. Simply changing the power setting on the strobe according to the distance and subject reflectance ensured consistently good exposures.
Keep fresh batteries in your strobe. Because this style of photography depends so heavily on the external flash, your images will suffer if the strobe is not operating efficiently because of exhausted batteries. I've been there and, regrettably, done that.