Model Subjects
 |
| The viewer's eyes follow the model's eyes, so there's rarely a reason for the model to stare into the lens. |
September 2003
Text and Photography by Stephen Frink
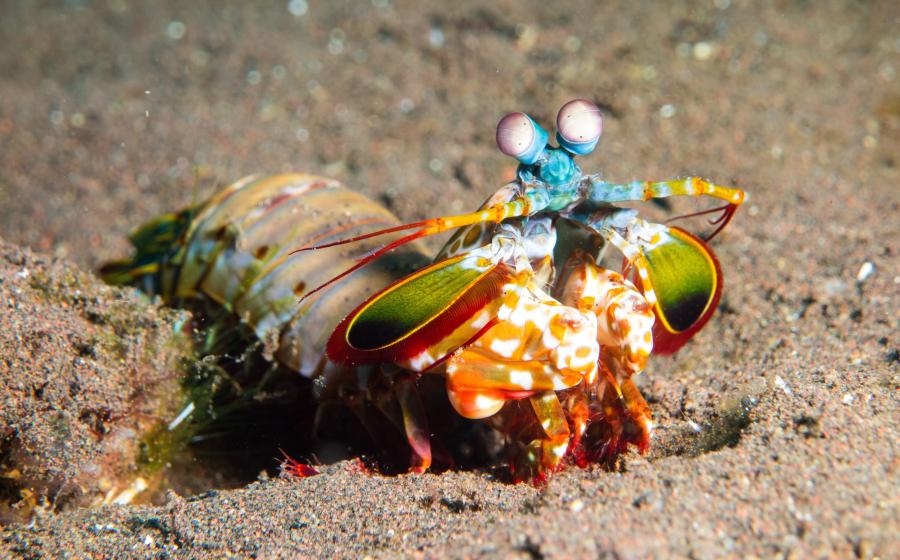
I have absolute respect for a photographer who can lie in the sand with a 200mm Micro-Nikkor for 30 minutes waiting for a garden eel to pop out of its burrow. But it ain't me, babe. I'm more interested in the big picture under water--reef scenics, schooling fish, sharks and, especially, people interacting with the marine environment.
Why people? Because they serve as stand-ins for the viewer. When someone looks at an image and sees another person, there's an immediate that-could-be-me connection. There is the psychological sense of immersion, a sense of belonging in the scene.
A diver also adds a compositional advantage by establishing a sense of scale. When a viewer sees a diver in a photo, he can tell exactly how immense that shipwreck is, or how tiny that cleaner shrimp is in comparison.
Help Wanted
The first step to photographing people under water successfully is finding a willing model, which is not always an easy task. Try to find a diver willing to work with you, ideally one with whom you can develop an ongoing professional relationship.
I married my underwater model, and now my daughter is a dive model too. Fortunately, they are both willing to take my direction, under water at least. You may be able to recruit your dive model without a lifetime personal commitment, but at least recognize that modeling is demanding work, and there needs to be some level of compensation. You can pay a model fee or show your appreciation in other ways. But realize that you are working together toward a common goal, and the underwater model is an equal contributor.
Don't expect to find a model on the way to the dive site. Your partner will need to know in advance what is expected, be there specifically for that purpose, and be willing to devote time and attention to your collaboration.
 |
| Divers add visual interest and a sense of scale to underwater photos. |
Directing 101
Your model needs to know what you expect from him, and you need to know how to communicate those expectations. Once under water, it may be too late to figure these things out. Instead, take the time before the dive to come up with mutually acceptable signals. Here are some that work for me:
> Sound. You can make a high-pitched "toot toot" sound through your regulator to get your model's attention. You could use a tank-banger or some other audible cue, but when both hands are occupied with camera and strobe, tooting is sometimes easier.
> Wiggling four fingers rapidly up and down. Means there is too much particulate matter in suspension at the present location, and you need to move to a new setup.
> Holding a forearm straight up. This tells the model that you're going to shoot a vertical format image and she should position herself accordingly.
> Holding a forearm to the side. This tells the model that you're going to shoot a horizontal format image and she should position herself accordingly.
> Tapping mask and pointing to an object. This signal is used to direct a model's eyes toward a particular subject.
> Making a circular motion with a hand. This indicates that the model should go back a little farther and swim into the scene.
> Pointing upward with the thumb rapidly. Tells the model to move up in the water column.
> Pointing downward with the thumb rapidly. Tells the model to move deeper in the water column.
> Holding hand in front of body, palm toward the model. Means "stop there."
> Holding palm toward the body, fingers together, motioning as if beckoning. Means "come closer."
Tools and Techniques
Most underwater photographers know that if you want good resolution and color, you have to get close to your subject. With a subject as large as a diver, the only way to cover a full body from three feet away or less is with a wide-angle lens. For Nikonos shooters, that means a Sea & Sea 12mm, or Nikonos 15mm or 20mm. RS shooters will use a 13mm primarily. Housed SLRs, digital or film, will use fixed-focal-length lenses from 16mm to 20mm, or zooms like the new Nikkor 12-24mm or the 17-35mm. Motormarine and prosumer housed digitals will likely use auxiliary wide lenses that the photographer can mount externally while under water.
Whatever the optic, the angle of coverage should range from about 85 degrees to 180 degrees at the widest. The great advantage to these lenses is their extreme depth of field. To get both a sponge in the foreground and a diver silhouette in the background in crisp focus requires a wide-angle lens, especially when working with the fine-grain, slow ISO films like Fuji Velvia.
The strobes used for model photography need to be wide-angle as well, typically by means of a diffuser or by use of multiple strobes. Whatever the light source, artistic model photography requires the ability to balance strobe light in the foreground with ambient light in the background. An accurate light meter (or a very good eye) will help determine the available light on the scene. Being skilled in lighting technique, including choosing the right shutter speed, selecting the right strobe power, figuring out the appropriate strobe-to-subject distance and aiming the strobe correctly, is crucial to effective model photography.
Looking Back
Reviewing your work with your model is one of the most important parts of the collaboration, assuming your relationship is not a one-dive-stand. To do it better next time, you'll need to learn from how you did it last time.
Discuss what went right and what went wrong on the dive, study the shots that worked, and especially learn from those that didn't. Use a quality loupe on the light table, project the slides, or bring the digital images up on the computer monitor to examine all aspects of the shot. Examine all aspects of the shot: focus, exposure, model posture and marine life interaction are all important variables. Other than the marine life, all the elements are in your collective control. With the right skill set and communication between shooter and model, you can achieve a high success rate. I know that I've got a lot more great shots of models than I have of garden eels.
|| |---|
||
| The viewer's eyes follow the model's eyes, so there's rarely a reason for the model to stare into the lens.|
September 2003
Text and Photography by Stephen Frink
I have absolute respect for a photographer who can lie in the sand with a 200mm Micro-Nikkor for 30 minutes waiting for a garden eel to pop out of its burrow. But it ain't me, babe. I'm more interested in the big picture under water--reef scenics, schooling fish, sharks and, especially, people interacting with the marine environment.
Why people? Because they serve as stand-ins for the viewer. When someone looks at an image and sees another person, there's an immediate that-could-be-me connection. There is the psychological sense of immersion, a sense of belonging in the scene.
A diver also adds a compositional advantage by establishing a sense of scale. When a viewer sees a diver in a photo, he can tell exactly how immense that shipwreck is, or how tiny that cleaner shrimp is in comparison.
Help Wanted
The first step to photographing people under water successfully is finding a willing model, which is not always an easy task. Try to find a diver willing to work with you, ideally one with whom you can develop an ongoing professional relationship.
I married my underwater model, and now my daughter is a dive model too. Fortunately, they are both willing to take my direction, under water at least. You may be able to recruit your dive model without a lifetime personal commitment, but at least recognize that modeling is demanding work, and there needs to be some level of compensation. You can pay a model fee or show your appreciation in other ways. But realize that you are working together toward a common goal, and the underwater model is an equal contributor.
Don't expect to find a model on the way to the dive site. Your partner will need to know in advance what is expected, be there specifically for that purpose, and be willing to devote time and attention to your collaboration.
|| |---|
||
| Divers add visual interest and a sense of scale to underwater photos.|
Directing 101
Your model needs to know what you expect from him, and you need to know how to communicate those expectations. Once under water, it may be too late to figure these things out. Instead, take the time before the dive to come up with mutually acceptable signals. Here are some that work for me:
> Sound. You can make a high-pitched "toot toot" sound through your regulator to get your model's attention. You could use a tank-banger or some other audible cue, but when both hands are occupied with camera and strobe, tooting is sometimes easier.
> Wiggling four fingers rapidly up and down. Means there is too much particulate matter in suspension at the present location, and you need to move to a new setup.
> Holding a forearm straight up. This tells the model that you're going to shoot a vertical format image and she should position herself accordingly.
> Holding a forearm to the side. This tells the model that you're going to shoot a horizontal format image and she should position herself accordingly.
> Tapping mask and pointing to an object. This signal is used to direct a model's eyes toward a particular subject.
> Making a circular motion with a hand. This indicates that the model should go back a little farther and swim into the scene.
> Pointing upward with the thumb rapidly. Tells the model to move up in the water column.
> Pointing downward with the thumb rapidly. Tells the model to move deeper in the water column.
> Holding hand in front of body, palm toward the model. Means "stop there."
> Holding palm toward the body, fingers together, motioning as if beckoning. Means "come closer."
Tools and Techniques
Most underwater photographers know that if you want good resolution and color, you have to get close to your subject. With a subject as large as a diver, the only way to cover a full body from three feet away or less is with a wide-angle lens. For Nikonos shooters, that means a Sea & Sea 12mm, or Nikonos 15mm or 20mm. RS shooters will use a 13mm primarily. Housed SLRs, digital or film, will use fixed-focal-length lenses from 16mm to 20mm, or zooms like the new Nikkor 12-24mm or the 17-35mm. Motormarine and prosumer housed digitals will likely use auxiliary wide lenses that the photographer can mount externally while under water.
Whatever the optic, the angle of coverage should range from about 85 degrees to 180 degrees at the widest. The great advantage to these lenses is their extreme depth of field. To get both a sponge in the foreground and a diver silhouette in the background in crisp focus requires a wide-angle lens, especially when working with the fine-grain, slow ISO films like Fuji Velvia.
The strobes used for model photography need to be wide-angle as well, typically by means of a diffuser or by use of multiple strobes. Whatever the light source, artistic model photography requires the ability to balance strobe light in the foreground with ambient light in the background. An accurate light meter (or a very good eye) will help determine the available light on the scene. Being skilled in lighting technique, including choosing the right shutter speed, selecting the right strobe power, figuring out the appropriate strobe-to-subject distance and aiming the strobe correctly, is crucial to effective model photography.
Looking Back
Reviewing your work with your model is one of the most important parts of the collaboration, assuming your relationship is not a one-dive-stand. To do it better next time, you'll need to learn from how you did it last time.
Discuss what went right and what went wrong on the dive, study the shots that worked, and especially learn from those that didn't. Use a quality loupe on the light table, project the slides, or bring the digital images up on the computer monitor to examine all aspects of the shot. Examine all aspects of the shot: focus, exposure, model posture and marine life interaction are all important variables. Other than the marine life, all the elements are in your collective control. With the right skill set and communication between shooter and model, you can achieve a high success rate. I know that I've got a lot more great shots of models than I have of garden eels.